Hey there, sound enthusiasts! Are you ready to take your mixing game to the next level? Imagine listening to your music and feeling every beat, every nuance, and every chord in its fullest glory. That’s what happens when your studio monitors are calibrated correctly! But hold your horses—before diving into your next big project, let’s talk about an often-overlooked moment: calibrating those monitors. Too many budding producers miss this step, thinking it’s only for the pros. But trust us, calibrating your studio monitors can transform your sound experience and make a world of difference in the quality of your mixes.
In this post, we’re going to break down the why, how, and what of calibrating your studio monitors in a way that’s not only easy to understand but also super actionable. You’ll learn exactly what tools to use, the essential techniques to apply, and even some common pitfalls to avoid. By the end, you’ll be equipped to create mixes that translate beautifully no matter where they’re listened to—whether it’s high-end headphones or in a car stereo. So, grab a comfy seat, and let’s fine-tune your audio journey together!
1. Understanding the Importance of Calibration in Audio Production
Calibration in audio production is like tuning a musical instrument before a performance; it ensures that everything sounds just right. If you’re serious about getting the best sound from your studio monitors, understanding calibration is essential. It allows you to create a mix that translates well across different playback systems, from car stereos to headphones.
The Role of Calibration
When you calibrate your studio monitors, you’re essentially aligning them to a specific environment and ensuring they produce accurate sound. This process involves adjusting volume levels, frequency response, and speaker placement, which is crucial for achieving an honest representation of your mix. For instance, if your monitors are too loud or too quiet, or if they emphasize certain frequencies, you might end up mixing a track that sounds fantastic in your studio but falls flat elsewhere.
Practical Tips for Calibration
- Room Treatment: Start by treating your room. Installing acoustic panels can minimize reflections and absorb unwanted frequencies. This simple step can significantly improve the accuracy of your monitors.
- Speaker Placement: Position your monitors at ear level, and form an equilateral triangle with your listening position. This setup helps you hear the sound as intended, without any phase cancellation.
- Use a Calibration Tool: Tools like the Sonarworks SoundID Reference can help you calibrate your monitors by measuring the room’s acoustics and suggesting adjustments.
Consider this: a producer named Mike had been struggling with his mixes sounding muddy when played on different systems. After calibrating his monitors and treating his room, he noticed a drastic improvement. His tracks not only sounded clearer but also translated beautifully across various playback systems. By investing time in calibration, you can elevate your audio production and ensure that your music truly shines, no matter where it’s played.
Initial Setup: Choosing the Right Environment for Calibration
When it comes to calibrating studio monitors for accurate sound, the environment in which you set up your gear plays a pivotal role. A well-chosen space can significantly enhance sound accuracy, while a poor choice can lead to frustrating audio issues. So, let’s dive into how to pick the perfect environment for your calibration journey!
Room Characteristics
First things first, consider the size and shape of your room. Ideally, a square or rectangular room with symmetrical walls helps in achieving balanced sound. For instance, a small, square bedroom might create unwanted bass buildup in the corners, resulting in a muddy sound. In contrast, a rectangular room allows sound waves to disperse more evenly, providing a clearer listening experience.
Avoiding Reflection and Absorption Issues
Next up, think about surfaces. Hard surfaces like concrete or tile can reflect sound waves, causing echoes that mess with your audio perception. Conversely, overly soft surfaces such as thick carpets or curtains can absorb too much sound, leading to a dull listening environment. Aim for a balanced mix! For example, placing a few acoustic panels on the walls can help reduce unwanted reflections without sacrificing warmth.
Location, Location, Location!
Now, let’s talk about placement. Position your monitors away from walls, ideally at least 1-2 feet, as this prevents bass buildup and ensures a cleaner sound stage. For instance, if you have a desk in the center of your room, try to angle your monitors slightly toward your listening position for the best experience. A simple trick: if you can form an equilateral triangle between your monitors and your head, you’re on the right track!
Lighting and Background Noise
Finally, don’t overlook lighting and background noise. Bright fluorescent lights can create an uncomfortable environment, leading to fatigue during long sessions. Soft, warm lighting can help you stay focused. Additionally, consider background noise. If your room is next to a busy street, you might want to use soundproofing techniques or even relocate to minimize distractions.
In summary, choosing the right environment for calibrating your studio monitors involves careful consideration of room characteristics, surface materials, monitor placement, and ambient conditions. By making these adjustments, you’re setting the stage for achieving the most accurate sound possible!
3. Measurement Tools and Software for Accurate Calibration
Understanding the Importance of Measurement Tools
When it comes to calibrating your studio monitors for accurate sound, measurement tools and software are your best friends. They provide the data you need to make informed adjustments, ensuring that what you hear in your studio is as true to the original mix as possible. Without these tools, you’re essentially flying blind, which can lead to mixes that sound great in your studio but fall flat elsewhere.
Essential Measurement Tools

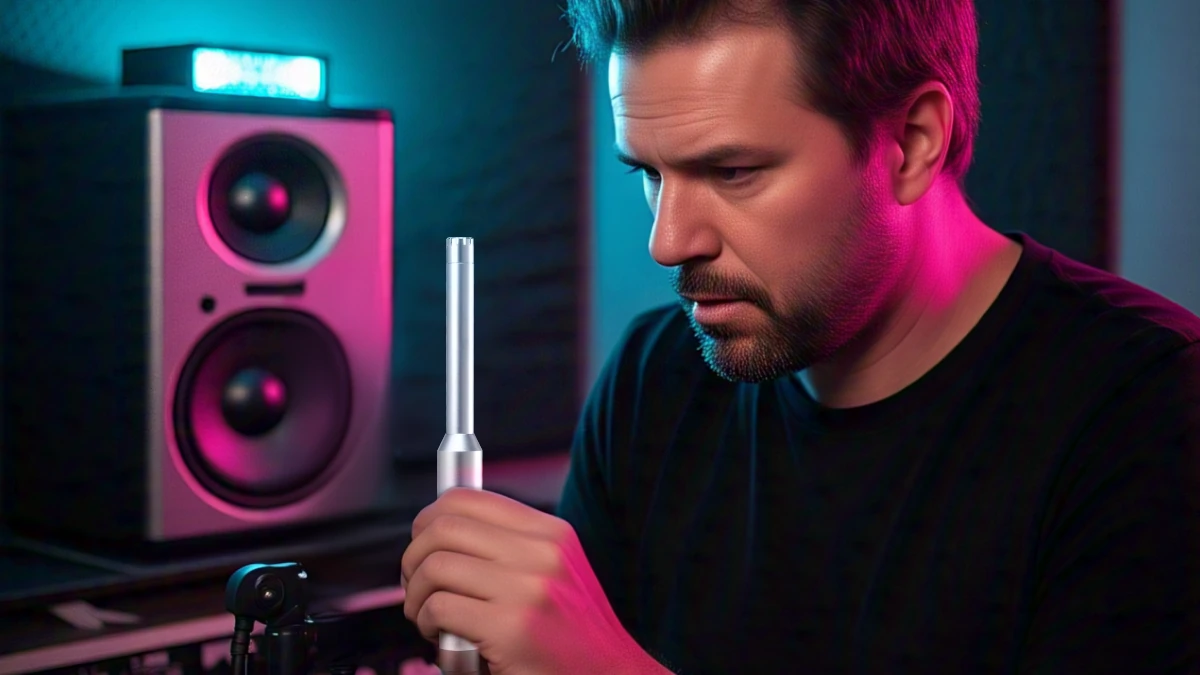
1. Measurement Microphone
First and foremost, invest in a quality measurement microphone. Unlike regular mics, these are designed to capture sound frequencies accurately across the entire spectrum. A popular choice is the Earthworks M30 or the Behringer ECM8000. These mics help you gather data directly from your listening environment, allowing you to see how your monitors are performing.
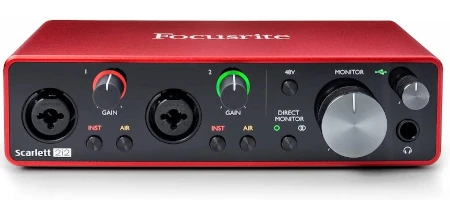
2. Audio Interface
Next, you’ll need an audio interface that supports the measurement microphone. A reliable option could be the Focusrite Scarlett 2i2, which provides high-quality inputs and outputs for your recording needs.
Software for Calibration
Once you have the necessary hardware, it’s time to explore software options. Here are a few noteworthy ones:
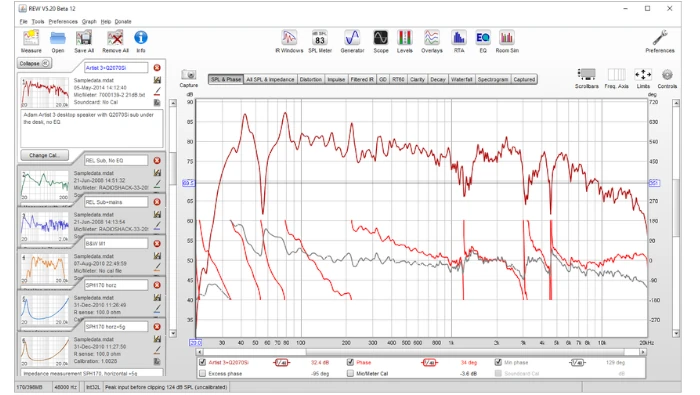
1. Room EQ Wizard (REW)
This free software is a favorite among audio professionals. REW allows you to analyze room acoustics and monitor performance through detailed frequency response graphs. After taking measurements, you can adjust EQ settings accordingly, achieving a more balanced sound.
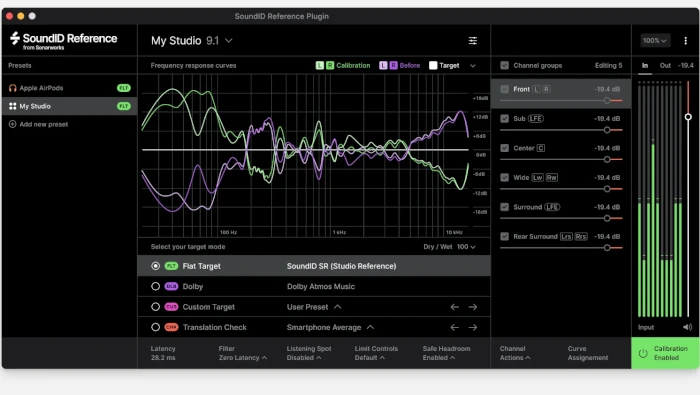
2. Sonarworks SoundID Reference
This software offers a more user-friendly interface and real-time adjustments. After calibration, it provides a correction profile for your monitors, ensuring that your mixes translate well across different listening environments.
Practical Tips for Using Measurement Tools
- Positioning Matters: When taking measurements, place the microphone at your listening position, ideally where your ears would be.
- Multiple Measurements: Don’t rely on a single measurement; take several at different points in your room to get a comprehensive understanding of how sound behaves.
- Analyze and Adjust: Use the data from your measurements to make informed adjustments to your monitor placement, room treatment, and EQ settings.
In summary, using quality measurement tools and software is essential for accurately calibrating your studio monitors. With the right gear and a little know-how, you can create an optimal listening environment that makes your mixes shine.
4. Step: Positioning Your Studio Monitors
When it comes to calibrating studio monitors for accurate sound, positioning them correctly is crucial. The way your monitors are set up can drastically affect how you perceive sound, and a few adjustments can make a significant difference in your mixing environment.
Understanding the Listening Position
The first thing to consider is your listening position. Ideally, you should form an equilateral triangle between you and your monitors. This means that the distance from each monitor to your ears should be equal. For example, if your monitors are 3 feet apart, you should sit 3 feet away from them. This creates an optimal sweet spot where you can hear the sound accurately.
Height Matters
Next, the height of your studio monitors is essential. The tweeters (the smaller speakers responsible for higher frequencies) should be at ear level when you are seated. If your monitors are too high or too low, you risk missing out on critical frequency information. A practical tip? Use monitor stands or pads to elevate them. If you’re working on a budget, even a stack of books can do the trick!
Avoiding Reflection Issues
Another important aspect is to minimize reflection issues. Placing your monitors too close to walls can cause sound waves to bounce back and create a muddy mix. Ideally, you should keep your monitors at least a foot away from the walls. You can test this by moving them around and listening for clarity. Trust your ears—if the sound feels more open and less cluttered, you’re on the right track!
Case Study: The Power of Positioning
Let’s look at a real-world example: a friend of mine, a budding producer, struggled with his mixes sounding off. After some investigation, we realized his monitors were pushed against the wall and angled towards him at an awkward height. Once he repositioned them following the equilateral triangle rule and raised them to ear level, his mixes transformed overnight! The clarity was remarkable, allowing him to make adjustments with confidence.
In conclusion, take some time to experiment with the positioning of your studio monitors. A few simple tweaks can lead to significant improvements in your sound accuracy, making all the difference in your mixing process!
5. Post-calibration Phase
Once you’ve gone through the initial setup and positioning of your studio monitors, it’s time to focus on the post-calibration phase. This stage is essential for ensuring that your studio monitors deliver the most accurate sound possible, allowing you to mix and produce music effectively.
Evaluate Your Listening Environment
Your room’s acoustics play a huge role in how your monitors sound. After calibration, take a moment to listen critically to your monitors. Try playing a few reference tracks—songs you know inside and out. Pay attention to how the bass, mids, and highs translate in your space. For example, if the bass feels overwhelming, it could indicate that the monitors are too close to a wall or that your room has significant bass buildup. A practical tip here is to use acoustic treatment, such as bass traps or diffusers, to minimize these issues.
Adjust Your Monitor Settings
Most monitors come with built-in EQ settings. After calibrating, it might be tempting to leave these as is, but tweaking them based on your listening tests can further enhance accuracy. For instance, if you notice that the high frequencies are too harsh, you can slightly reduce the treble on your monitor’s EQ setting. Always remember to make small adjustments, as extreme changes can lead to more problems than solutions.
Regularly Check and Re-Calibrate
Sound environments change over time—furniture gets moved, new gear is added, and seasonal changes can affect the acoustics. Schedule regular check-ins to assess your monitor calibration. For example, every few months or after significant changes in your studio setup, consider re-evaluating the position and calibration of your monitors. This ongoing process ensures that your mixing environment remains optimal.
In conclusion, the ‘Post’ phase is crucial for maintaining accurate sound from your studio monitors. By continually assessing your space, adjusting settings, and re-calibrating as needed, you’ll keep your mixes sounding great, ensuring that your productions translate well across various listening environments.
Conclusion
In summary, calibrating your studio monitors for accurate sound is an essential step in ensuring your mixes translate well across different playback systems. By carefully considering your room acoustics, positioning your monitors correctly, and utilizing tools such as measuring software and pink noise, you can significantly enhance your listening experience.
Key Takeaways:
- Room Acoustics: Understanding the influence of your room is crucial. Treating your space with bass traps, diffusers, and absorptive materials can correct issues before they affect your sound.
- Monitor Placement: The triangular configuration and appropriate distance from walls ensure that you hear the mix as it should be, avoiding unwanted resonances or reflections.
- Measuring and Tuning: Utilize acoustic measurement systems to professionally analyze your room’s response, allowing you to make informed adjustments.
- Regular Re-evaluation: As your studio or equipment evolves, so too should your monitor calibration process. Regular check-ins will keep your setup optimized.
Now that you’re equipped with the knowledge to get started on calibrating your studio monitors, it’s time to take action! Grab your measurement tools, make the necessary adjustments, and start producing sound that not only resonates but shines across all platforms. Don’t just leave it to chance—commit to achieving that sonic accuracy today!
Feel free to share your experiences or ask questions in the comments below. Happy mixing!