Imagine this: You’ve just finished setting up your brand-new home studio, the excitement is palpable, and you’re ready to unleash your creativity. You hit the record button, only to find that your audio sounds… off. Sound familiar? You’re not alone. The placement of your microphone can make or break your recordings. Whether you’re a budding musician, a seasoned podcaster, or just someone who loves creating audio content, getting your mic placement spot-on is the secret sauce to capturing pristine sound.
But don’t worry! You’re about to embark on a journey that will demystify this critical aspect of home studio setup. This isn’t some esoteric knowledge reserved for audio engineers in high-end studios. It’s accessible, actionable, and ready for you to implement right now. Join us as we dive into the art and science of microphone placement, ensuring you capture the best possible sound every time you hit that record button.
1. Acoustic Considerations for Optimal Microphone Placement
Understanding acoustic considerations is crucial when determining where a microphone should be placed in a home studio. The placement can significantly impact the quality of your recordings, making it essential to consider the unique acoustic properties of your space.
Sound Reflections and Absorption
Think about how sound travels in your room. Hard surfaces, such as bare walls and windows, tend to reflect sound, creating echoes. These reflections can muddy your recordings. To combat this, strategically place sound-absorbing materials like foam panels or heavy curtains around your room. Consider positioning your microphone away from these reflective surfaces to minimize unwanted reverb.
Room Modes and Standing Waves
Every room has specific frequencies that resonate more than others, known as room modes. These can create standing waves, which cause certain notes to sound louder or softer. To identify these, play a low-frequency tone and listen for resonant peaks. Placing your microphone at different heights or angles might help mitigate these peaks, ensuring a more balanced sound capture.
Practical Example: The Vocal Recording
Imagine you’re recording vocals. You might start by placing the microphone at least a foot away from walls and angled slightly off-axis to reduce direct reflections. Adding a reflection filter behind the mic can further help absorb sound, leading to a cleaner vocal take.
Experiment and Listen
Ultimately, experimentation is key. Record a few test takes with the microphone in different positions and listen critically. Adjusting even a few inches can make a noticeable difference, so don’t hesitate to try various setups until you find the sweet spot that works best for your specific room and recording needs.
2. Microphone Types and Their Ideal Positions
When considering where a microphone should be placed in a home studio, understanding the different microphone types and their ideal positions is crucial. The most common microphone types include dynamic, condenser, and ribbon microphones, each with its unique characteristics and optimal placements.
Dynamic Microphones
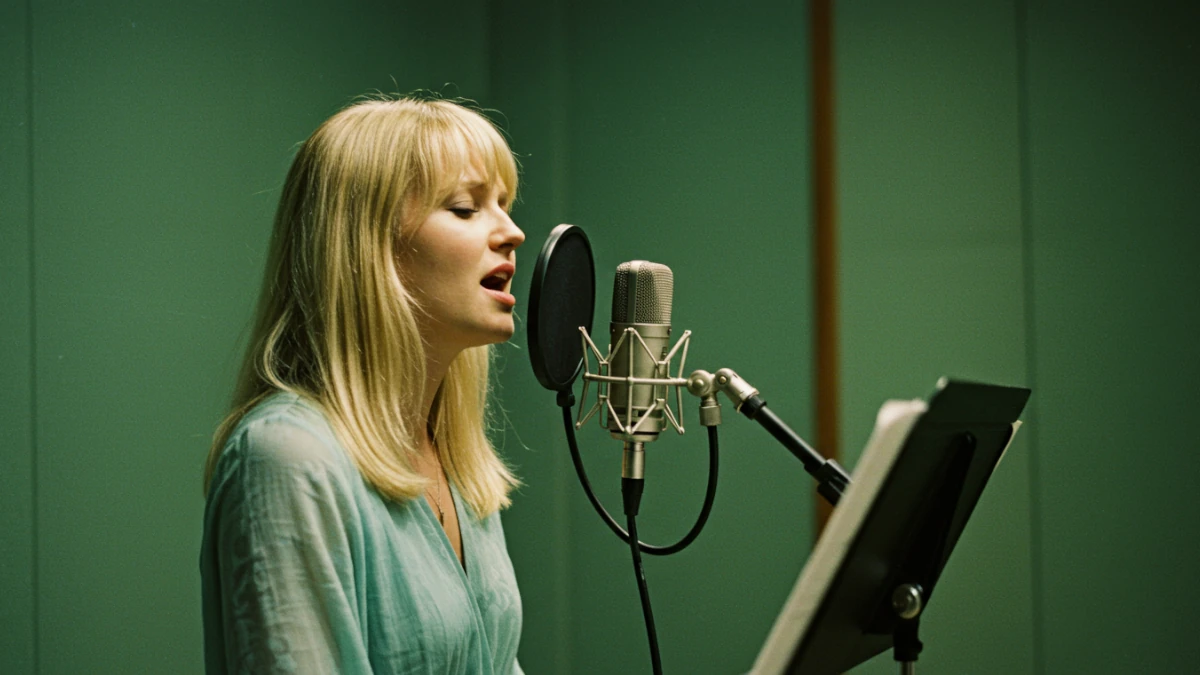
Dynamic microphones are known for their durability and ability to handle high sound pressure levels, making them ideal for loud sound sources like guitar amps or drums. In a home studio, positioning a dynamic mic close to a guitar amp can capture a punchy, direct sound. For vocals, placing the mic about 6 inches from the mouth is generally effective, but using a pop filter can help reduce plosive sounds.
Condenser Microphones
Condenser microphones are more sensitive and offer a broader frequency response, making them perfect for capturing vocals and acoustic instruments. In a home studio, positioning a condenser mic about 12 inches from a vocalist, slightly off-axis, can yield a natural and balanced recording. For acoustic guitars, placing the mic near the 12th fret captures a sweet spot that balances the body and strings’ sound.
Ribbon Microphones
Ribbon microphones are renowned for their warm, vintage sound. They are more fragile but can beautifully capture the nuances of string instruments and vocals. In a home studio, positioning a ribbon mic a few feet from the source, such as a violin or saxophone, allows it to capture the room’s natural acoustics along with the instrument’s richness.
Understanding these microphone types and their ideal positions can significantly enhance the quality of your recordings, providing clarity and depth that elevate your home studio productions.
3. Optimizing Microphone Distance and Angle for Various Instruments and Voices
Finding the sweet spot for your microphone in a home studio can significantly enhance the quality of your recordings. The placement of a microphone, including its distance and angle relative to the sound source, plays a crucial role in capturing the right tone and clarity. Let’s delve into how you can optimize these settings for various instruments and voices.
Vocals
When recording vocals, positioning the microphone around 6 to 12 inches away from the singer is generally ideal. This distance helps in capturing a clear and full sound while minimizing unwanted noise, such as breath sounds. Tilting the microphone slightly downward can help reduce plosive sounds, those pesky popping noises caused by letters like ‘p’ and ‘b’. Using a pop filter is another excellent way to tackle this issue.
Guitar
For acoustic guitars, distance and angle can dramatically change the sound captured. Positioning the microphone about 6 inches from the sound hole and angled towards the 12th fret can produce a balanced tone. This setup captures the warmth of the guitar body while maintaining the clarity of the strings. For electric guitars, a microphone placed 1 to 2 inches away from the amplifier’s speaker, angled slightly off-center, can effectively capture the rich, dynamic sound.
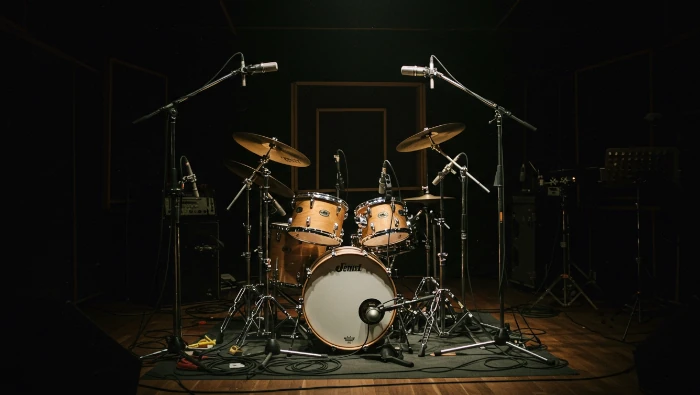
Drums
Drum recording demands a bit more finesse. For the snare drum, positioning the microphone 2 inches above the drum head at a 45-degree angle captures the snap and resonance effectively. Meanwhile, placing a microphone 3 to 6 inches from the kick drum’s resonant head, slightly off-center, can help catch the deep thud that forms the backbone of many tracks.
Experimenting with these tips in your home studio can help you discover the optimal microphone placement for your specific setup, enhancing your recordings’ overall quality and authenticity.
4. Dealing with Common Home Studio Challenges
Setting up a microphone in a home studio can feel like a balancing act, particularly when you’re dealing with the usual suspects of home studio challenges. From limited space to unwanted noise, each issue can impact your recording quality. Let’s dive into some common hurdles and practical solutions to ensure your microphone placement enhances your soundscape.
Space Constraints
One of the most prevalent challenges is the lack of space. In a cramped home studio, finding the right spot for your microphone can be tricky. Consider utilizing a corner of the room, but be mindful of reflections that can muddy your recording. A portable vocal booth or acoustic panels can help absorb excess sound waves, allowing your microphone to capture cleaner audio. For example, placing acoustic foam behind and on the sides of the mic can significantly improve sound quality in tight spaces.
Background Noise
Background noise from appliances, traffic, or even the buzzing of electronics can be a bane for home studio recordings. Positioning your microphone away from noise sources is crucial. A condenser mic, known for its sensitivity, might pick up these sounds more than a dynamic mic. Try placing your microphone on a shock mount to reduce vibrations from the floor or desk. Additionally, using a noise gate plugin during post-production can help eliminate unwanted noise.
Room Acoustics
Every room has its own acoustic fingerprint, and untreated rooms can lead to echo and resonance issues. Experiment with placing your microphone at different distances from reflective surfaces like windows or mirrors. Hanging heavy curtains or using bookshelves filled with books can help diffuse sound. For instance, if you notice an echo when placing the microphone near a wall, try moving it to the center of the room or adding a rug to absorb some of the sound.
By addressing these common challenges, you can optimize your microphone placement, even in the most cluttered or noisy home studios. Remember, each room is unique, so don’t hesitate to experiment until you find the sweet spot for your sound.
5. Microphone Placement Techniques for Different Recording Goals
Determining where a microphone should be placed in a home studio can dramatically influence the quality of your recordings. Whether you’re aiming for an intimate vocal take or an expansive drum sound, understanding microphone placement techniques is key. Let’s dive into some practical tips and examples that will guide you toward achieving your specific recording goals.
Capturing Vocals with Precision
To achieve a clear and professional vocal recording, position the microphone at the singer’s mouth level, maintaining a distance of 6 to 12 inches. This range strikes a balance between capturing a natural tone and reducing plosive sounds like ‘p’ and ‘b,’ which can be further controlled with a pop filter. For added warmth, experiment with tilting the microphone slightly upward or downward. If you’re aiming for a more intimate vibe, moving the mic closer can enhance the sense of presence, but keep an ear out for the proximity effect, which can exaggerate low frequencies and muddy the sound. Adjusting these elements thoughtfully can elevate your vocal recordings to studio-quality levels.
Recording Acoustic Instruments
For acoustic guitars, a common technique is placing the microphone around 12 inches away, aimed at the 12th fret. This captures a balanced mix of the rich body and bright strings. Experiment with angles to find the sweet spot that suits your instrument’s unique sound. For a piano, positioning a pair of microphones over the hammers provides a bright and clear capture, while placing them towards the tail brings out the bass and resonance.
Getting the Right Drum Sound
Drum kits are a unique challenge due to their complexity. A popular method is the Glyn Johns technique, which uses two microphones: one overhead and another near the floor tom. This setup captures the kit’s stereo image with depth and clarity. Additionally, close-mic the snare and kick drum to ensure their punch is present in the mix.
Enhancing Room Ambiance
To capture room ambiance, try placing a microphone several feet away from the sound source, at ear height. This technique is particularly effective for orchestral recordings or when you want to include the room’s character in the track. Adjust the microphone distance and height to control the amount and quality of reverb captured.
Experimenting with these techniques in your home studio will lead you to discover the ideal microphone placement for your specific recording needs. Remember, the key is to listen and adjust until you achieve the sound that best fits your artistic vision.
Conclusion
As you’ve navigated the multifaceted journey of setting up your microphone in a home studio, consider the golden nuggets of wisdom uncovered. Choosing the right placement for your microphone can significantly impact the quality of your recordings, and getting it wrong can introduce unnecessary obstacles to your projects. We’ve explored how microphone height, distance, and angle can all influence the sound’s clarity and resonance. Understanding room acoustics, such as utilizing soundproofing measures and strategically choosing a microphone type that suits your recording needs, emerged as crucial components in achieving professional sound quality.
Consistent experimentation is key; don’t shy away from testing different setups to discover the optimal configuration tailored to your unique space and requirements. Perhaps, use these tips as a starting framework, but let your creative intuition guide you further.
Now, it’s time to take action: gather your equipment, apply what you’ve learned, and start experimenting with microphone placement right today. Share your successes and challenges with fellow creators in a community or on social media platforms, continuing the dialogue and learning process. Become part of a movement that thrives on perfecting the art of home recording, one microphone adjustment at a time. So, what are you waiting for? Get hands-on, embrace the process, and elevate your home studio game!