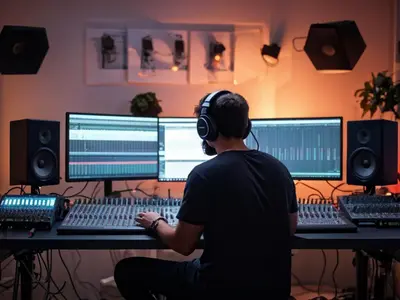
In today's music world, recording software is essential for turning your creative ideas into polished tracks. Whether you're a budding musician, podcaster, or content creator, having the right tools can make all the difference. For beginners, diving into the world of recording can feel overwhelming. That's why choosing the right software is crucial.
Easy-to-use recording software simplifies the process, allowing you to focus on what matters most—your creativity. With beginner-friendly options, you can start recording, editing, and producing without getting bogged down by complicated features. The right software can turn your laptop into a mini recording studio , empowering you to bring your musical vision to life.
This guide will explore some of the best recording software designed with beginners in mind. Whether you’re looking to record your first song, create a podcast, or experiment with sound, we’ve got you covered. By the end, you'll feel confident in choosing the right software to kickstart your creative journey. Let's dive in!
What to Look for in Beginner-Friendly Recording Software
When you're just starting out with recording, choosing the right software can be a game-changer. With so many options available, it’s important to know what features will help you learn quickly and produce quality work. Here’s what you should focus on when picking beginner-friendly recording software .
1. Intuitive Interface
As a beginner, you want software that’s easy to navigate. Look for a clean, user-friendly interface that won’t overwhelm you with too many options. The simpler the layout, the quicker you’ll get the hang of things. Drag-and-drop functionality and clear labels can help make your experience smoother.
2. Built-in Tutorials and Resources
Software that comes with built-in tutorials, tooltips, or even video guides is invaluable for beginners. These resources can guide you through the basics without having to search the web for help. Some programs even offer interactive lessons to get you recording and editing right away.
3. Affordability and Free Trials
When you’re just getting started, you don’t want to spend a fortune on software. Many beginner-friendly programs offer free versions or trials. This allows you to test the waters before committing to a purchase. Affordable pricing or a free tier is a must for those on a budget.
4. Basic Editing Tools
Focus on software that provides essential editing tools, like cutting, trimming, and layering tracks. Advanced features can be overwhelming at first, so it’s better to stick with the basics. Once you’re comfortable, you can gradually explore more complex tools.
5. Compatibility with Your Equipment
Make sure the software you choose is compatible with your computer and any other equipment you plan to use, such as microphones or MIDI controllers. Check the system requirements before downloading to avoid technical headaches.By prioritizing these features, you'll find software that makes the recording process enjoyable rather than intimidating. Keep it simple, and you'll be making music or content in no time!
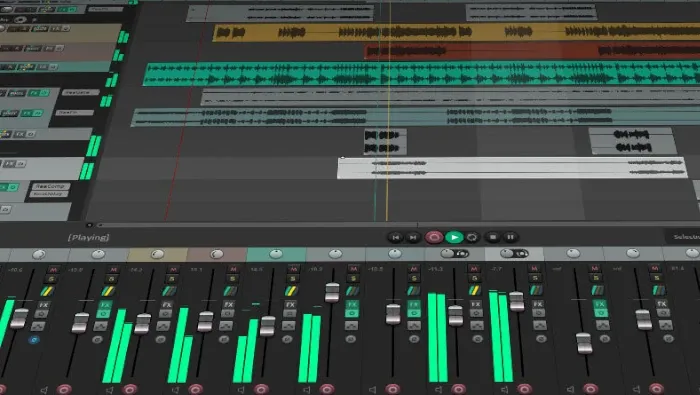
Top 5 Easy-to-Use Recording Software Options
Choosing the right recording software can make a huge difference for beginners. With so many options available, it’s important to find one that balances simplicity with functionality. Here are the top five easy-to-use recording software options that are perfect for getting started.
1. Audacity
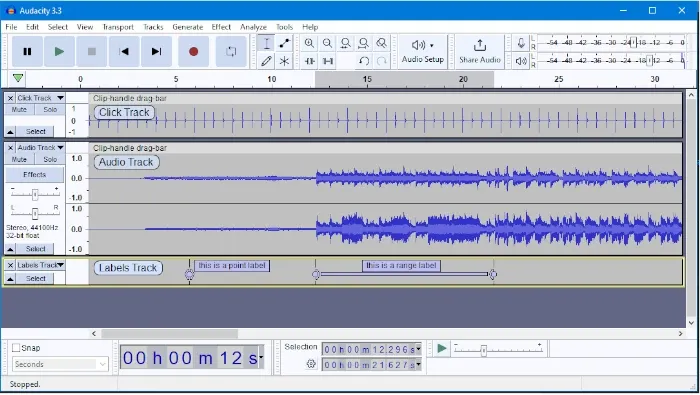
Audacity is a free, open-source software that’s popular among beginners and professionals alike. Its straightforward interface makes it easy to record, edit, and mix audio tracks. While it lacks some advanced features, Audacity provides all the basics you need to create high-quality recordings. Plus, it’s available on both Windows and macOS.
2. GarageBand
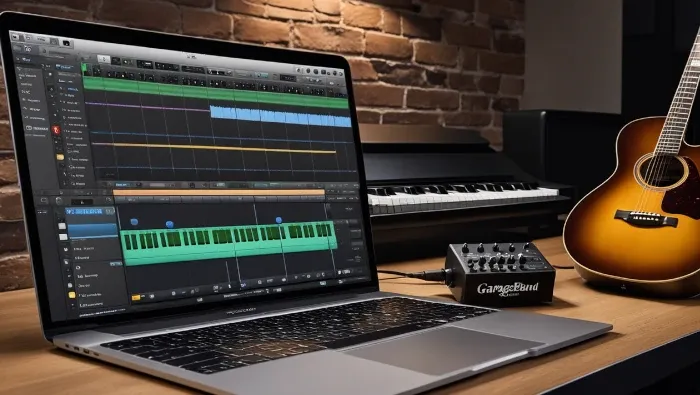
If you’re an Apple user, GarageBand is an excellent choice. This free software comes pre-installed on most Mac devices and offers a user-friendly experience. With its drag-and-drop interface, built-in instruments, and loop library, GarageBand allows you to create professional-sounding tracks with minimal effort. It’s perfect for beginners looking to explore music production.
3. Cakewalk by BandLab
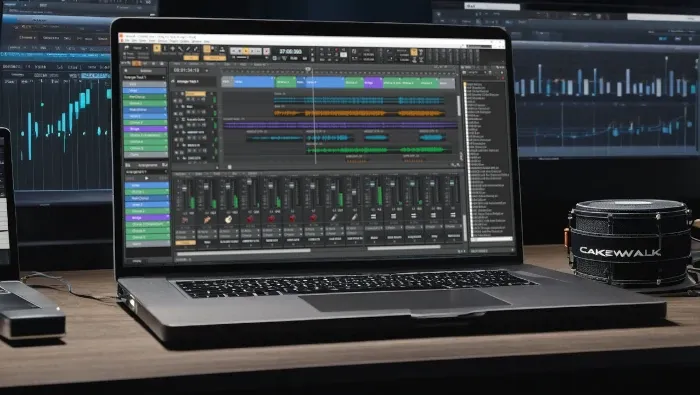
Cakewalk is another great free option, but it’s only available on Windows. Despite being free, it’s packed with powerful features that are easy to learn. With a clean interface and helpful tutorials, Cakewalk makes recording, editing, and mixing music accessible to newcomers. It’s a solid choice if you’re looking for more advanced capabilities without the price tag.
4. FL Studio Fruity Edition
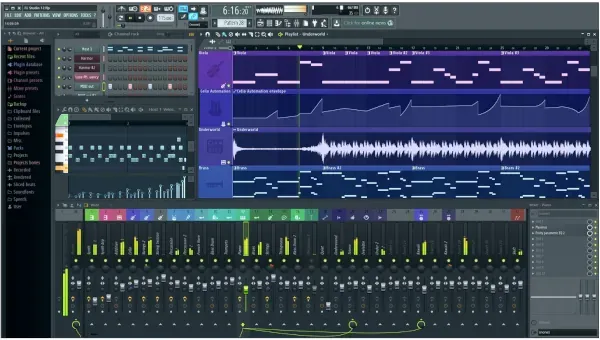
FL Studio is a popular digital audio workstation (DAW) known for its intuitive design and wide range of features. The Fruity Edition is a beginner-friendly version that offers essential tools for recording and editing, without overwhelming you with advanced options. While it’s not free, it’s reasonably priced and available on both Windows and macOS.
5. Reaper
Reaper is a versatile DAW that offers a 60-day free trial, making it a great option for beginners who want to test out more advanced software. Despite its rich feature set, Reaper remains user-friendly, with customizable layouts and a supportive online community. After the trial, Reaper is affordable, and it works on both Windows and macOS.
These five options provide a range of tools to help you get started with recording. Whether you’re looking for a free solution like Audacity or GarageBand, or you’re ready to invest in something like FL Studio or Reaper, each of these programs will help you turn your ideas into reality . Give them a try and find the one that fits your needs best!
Step-by-Step Guide: Getting Started with Your Chosen Software
Once you've picked your recording software, it’s time to dive in and start creating! This step-by-step guide will help you get started, using GarageBand as an example. Even if you're using a different program, the basic steps are similar and will help you get comfortable with your chosen software.
Step 1: Install and Launch the Software
First, download and install GarageBand from the App Store if it’s not already on your Mac. Once installed, launch the application. You'll be greeted with a welcome screen where you can choose to start a new project.
Step 2: Set Up Your Project
Click on "Empty Project" to start a new session. GarageBand will then ask you to choose a track type. For beginners, selecting the "Audio" option is a good start if you’re recording vocals or instruments. If you’re using a MIDI controller or want to explore digital instruments, you can select "Software Instrument."
Step 3: Configure Your Inputs
Next, ensure your audio input is set correctly. If you're using an external microphone or audio interface, make sure GarageBand recognizes it. Go to "GarageBand" in the menu bar, click "Preferences," then select the "Audio/MIDI" tab. Choose your input device from the dropdown menu.
Step 4: Record Your First Track
With your input set up, it's time to record. Click the red record button at the top of the screen, then start playing or singing. GarageBand will capture your performance. Don’t worry if it’s not perfect—you can always re-record or edit later.
Step 5: Edit Your Recording
After recording, you can edit your track using GarageBand’s simple tools. Use the scissors icon to cut and trim your audio, or add effects like reverb and EQ to enhance your sound. Drag and drop additional loops or recordings to layer your project.
Step 6: Save and Export Your Work
Once you're happy with your project, save your work by clicking "File" and selecting "Save As." When you’re ready to share your track, export it by choosing "Share" and then "Export Song to Disk." You can save your file in various formats like MP3 or WAV.By following these steps, you'll quickly become comfortable with GarageBand or any other recording software you choose. Remember, practice makes perfect! Experiment with different features, and soon you'll be producing tracks like a pro.
Common Challenges and How to Overcome Them
Starting with recording software can be exciting, but it’s normal to encounter a few bumps along the way. From technical hiccups to feeling overwhelmed by features, beginners often face common challenges. The good news is that these obstacles are easy to overcome with the right approach. Let’s tackle some of the most common issues and how you can solve them.
1. Learning the Interface
At first, the interface of your recording software may seem confusing. With so many buttons, menus, and options, it’s easy to feel lost. The key to overcoming this is to take it step by step. Start with basic tasks like recording a track and making simple edits. Many programs, like Audacity and GarageBand, offer built-in tutorials or user guides that can help you learn as you go. Don’t hesitate to watch YouTube tutorials or seek out community forums for additional support.
2. Audio Quality Issues
One frustrating challenge is poor audio quality, whether it's due to background noise, low volume, or distortion. This can often be fixed with a few simple adjustments. Ensure that your microphone or input device is properly configured in the software’s settings. Experiment with the input gain (volume) to avoid clipping or distortion. If background noise is an issue, try using noise reduction tools found in your software, or record in a quieter environment.
3. Struggling with Editing Tools
Editing your recordings can be tricky at first, especially if you’re unsure how to use the tools. The best way to improve is through practice. Start with basic tasks like cutting, trimming, and arranging clips. As you become more comfortable, you can experiment with effects like EQ, reverb, or compression. Remember, many editing tools have undo buttons, so don’t be afraid to try things out!
4. Feeling Overwhelmed by Advanced Features
It’s easy to feel overwhelmed by all the advanced features in modern recording software. Don’t worry—start small! Focus on mastering the basics first, like recording and simple edits. Once you’re comfortable, gradually explore more advanced tools. Many programs allow you to customize the interface to hide features you’re not ready to use, which can make the learning process less intimidating.
5. Technical Issues and Crashes
Technical problems like software crashes or compatibility issues can be frustrating. Always save your work frequently to avoid losing progress. If your software crashes often, check for updates or try reinstalling the program. Make sure your computer meets the system requirements for the software. If you’re still having trouble, search online for solutions or contact customer support.By tackling these challenges one step at a time, you'll build confidence and improve your skills. Remember, every problem has a solution, and with persistence, you’ll become more proficient with your recording software. Keep experimenting, learning, and most importantly—have fun with the process!
Conclusion: Start Creating with Confidence
Now that you’ve explored the essentials of beginner-friendly recording software, it’s time to take the leap and start creating with confidence. Remember, the right software can make the recording process enjoyable and accessible, allowing you to focus on your creativity rather than getting bogged down by technical details.
Whether you've chosen a free option like Audacity or GarageBand, or decided to try out a more advanced tool like FL Studio or Reaper, the key is to get started. Don’t worry about perfection—every great creator began with their first recording, learning and improving along the way. Embrace the process, and don’t be afraid to experiment with different sounds, effects, and techniques.
As you continue to practice and refine your skills, you’ll find that what once seemed complex becomes second nature. Overcoming challenges and mastering new tools will build your confidence and open up endless possibilities for your music or content creation journey.
So, go ahead—launch your software, hit that record button, and start turning your ideas into reality. Your creative journey is just beginning, and with the right tools and mindset, the sky’s the limit. Happy recording!
Rodrigo Marques
Rodrigo Marques, founder of Home Studio Start, is a music production veteran with over 25 years of experience. Since 1997, he has mastered tools like Sound Forge, Samplitude Pro, and VST plugins, producing albums for emerging artists globally. Creator of the innovative Formula HSS for mixing and mastering, Rodrigo has empowered thousands through online courses and his ebook, Home Studio Start. Dedicated to democratizing music production, he equips aspiring artists with skills for professional-grade music and sustainable careers.
About the author