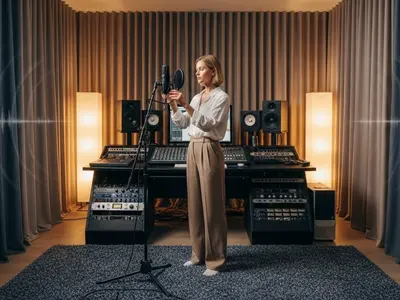
A vocal booth is a dedicated, enclosed space designed specifically for recording vocals. It’s an essential component for any home studio aiming to produce professional-quality recordings. By creating a controlled acoustic environment, a vocal booth minimizes ambient noise and unwanted reflections, resulting in cleaner and more focused recordings.
One of the primary benefits of a vocal booth is its ability to isolate sound. This isolation ensures that external noises, such as traffic, household sounds, or even the hum of your computer, don't interfere with your recordings. Additionally, a vocal booth helps manage the acoustics within the space, reducing issues like reverb and echo that can muddy your vocal tracks.
Vocal booths are invaluable for various recording projects. Whether you’re a musician laying down vocal tracks, a podcaster striving for clear and professional audio, or a voice-over artist needing pristine sound, a vocal booth enhances your work's overall quality. By investing time and resources into setting up a proper vocal booth, you’ll ensure your recordings stand out with clarity and precision.
For those just starting with home studio setups, learning the fundamentals of creating an optimal recording space can be a game-changer. This guide will walk you through the process of selecting the right space, applying acoustic treatments, building your booth, and setting up the necessary equipment. As you embark on this journey, you’ll find that a well-designed vocal booth is not just a luxury but a necessity for achieving top-notch audio quality. For more tips on recording vocals in your home studio, check out 5 Tips to Record Vocals in Your Home Studio .
By the end of this guide, you’ll have a thorough understanding of how to create a vocal booth that meets your needs, fits your budget, and significantly improves your recording outcomes.
Choosing the Right Space
Selecting the perfect location for your vocal booth is a crucial step in setting up your home studio. The right space will not only accommodate your recording needs but also enhance the overall quality of your recordings.
Room Size and Shape
Start by evaluating the size and shape of the available rooms. Ideally, choose a space that's not too small to avoid a boxy, confined sound but not too large where it becomes challenging to control acoustics. A medium-sized room is typically the best option. Rectangular rooms are generally better than square ones, as they help in reducing standing waves and unwanted resonances.
Noise Sources
Consider the proximity to noise sources. Select a room that's farthest from external noise like traffic, neighbors, or household activities. Basements or interior rooms often make excellent choices because they are naturally more insulated from outside noise. Pay attention to potential internal noise sources, such as air conditioning units, refrigerators, or plumbing, and plan accordingly to minimize their impact on your recordings.
Accessibility and Convenience
Ensure the space is easily accessible and convenient for your recording sessions. If you plan to use a closet or corner of a room, make sure it’s not in a high-traffic area where interruptions might occur frequently. Additionally, consider the room’s ventilation and lighting, as a comfortable environment will make longer recording sessions more manageable.
Maximizing Small Spaces
If you’re working with limited space, get creative with your setup. A closet can be transformed into an effective vocal booth with the right acoustic treatment and equipment placement. Use portable soundproofing solutions like acoustic panels or foam tiles that can be mounted temporarily. Corner spaces can also be utilized by constructing a simple frame and covering it with sound-absorbing materials.
Multi-purpose Use
Think about how the space will be used when you’re not recording. If the room serves multiple purposes, ensure that your vocal booth setup can be easily disassembled or rearranged. Foldable or mobile soundproofing panels can provide flexibility, allowing you to convert the room back to its original use when necessary.
Planning for Future Expansion
Consider your future needs as well. If you plan to upgrade your equipment or expand your studio, choose a space that can accommodate these changes. Investing in a slightly larger area now can save you the hassle of relocating or reconstructing your vocal booth later on.By carefully selecting the right space, you’ll lay a strong foundation for your vocal booth, ensuring it meets both your immediate and future recording needs. For additional tips on enhancing your home studio setup, explore 5 Tips to Improve the Audio Quality of Your Home Studio .
Acoustic Treatment Essentials
Acoustic treatment is vital for achieving professional-quality recordings in your vocal booth. Proper treatment ensures that your recordings are clear and free from unwanted reverberations and echoes. Here’s a comprehensive guide to the essentials of acoustic treatment.
Soundproofing vs. Sound Absorption
Understanding the difference between soundproofing and sound absorption is crucial. Soundproofing prevents external noise from entering the booth and internal sound from escaping, whereas sound absorption focuses on reducing reflections within the booth to create a cleaner recording environment. Both are important, but they serve different purposes.
Materials for Acoustic Treatment
Invest in quality materials designed specifically for acoustic treatment.
Common materials include:
As an Amazon Associate I earn from qualifying purchases.
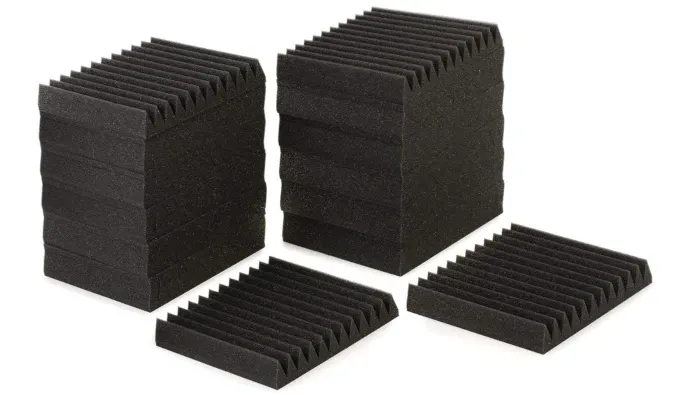
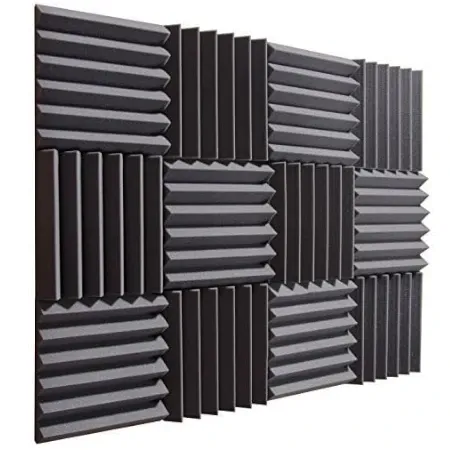
- Acoustic Foam Panels: These are used to absorb mid to high frequencies and reduce echoes. They are easy to install and available in various shapes and sizes.
As an Amazon Associate I earn from qualifying purchases.
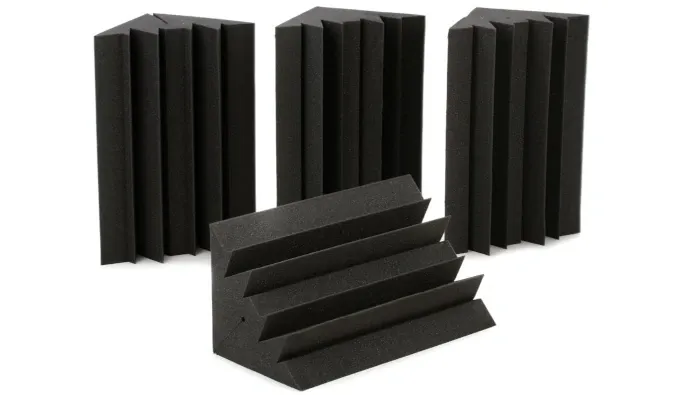
- Bass Traps: These are thicker foam panels designed to absorb low frequencies that often accumulate in corners. Placing bass traps in the corners of your vocal booth can significantly improve sound clarity.
As an Amazon Associate I earn from qualifying purchases.
- Diffusers: These scatter sound waves rather than absorb them, helping to maintain a natural sound within the booth. They are particularly useful in larger spaces.
DIY and Budget-Friendly Options
Acoustic treatment can be expensive, but there are budget-friendly and DIY options available:
- Blankets and Curtains: Heavy blankets or moving blankets can be hung on the walls to absorb sound. Thick curtains can also be used to cover windows and further reduce noise.
- Carpets and Rugs: Placing a thick rug on the floor can help to absorb sound and reduce reflections.
- Homemade Panels: Create your own acoustic panels using wooden frames, rock wool, and fabric. These DIY panels can be just as effective as commercially available options.
Placement of Acoustic Treatments
Strategically placing your acoustic treatments is key to their effectiveness. Here are some tips:
- Walls: Cover as much wall space as possible with acoustic panels, especially at the reflection points where sound waves bounce back towards the microphone.
- Corners: Install bass traps in the corners to manage low-frequency buildup.
- Ceiling: If possible, add foam panels or diffusers to the ceiling to prevent sound waves from bouncing up and down.
Additional Soundproofing Measures
While acoustic treatment focuses on sound absorption, additional soundproofing can further improve your recording environment:
- Seal Gaps: Use weatherstripping or acoustic sealant to seal gaps around doors and windows to prevent sound leakage.
- Double Doors: Installing a second door or using a heavy, solid-core door can significantly reduce noise transmission.
- Floor Isolation: Use rubber mats or carpets to isolate the floor and reduce vibrations from external sources.
Testing and Adjusting
Once your acoustic treatments are in place, test the booth’s acoustics by recording and listening to the playback. Make adjustments as needed. Move panels around, add more treatments, or modify existing ones until you achieve the desired sound quality.By implementing these acoustic treatment essentials, you'll create a vocal booth that delivers clear, professional recordings every time. For more in-depth information on acoustic insulation, check out Home Studio Acoustic Insulation .
Building the Vocal Booth
Creating a vocal booth in your home studio might seem intimidating at first, but it's absolutely achievable with the right approach. With a few essential materials and some thoughtful planning, you can craft an impressive recording space. Here's how to get started on your journey to building your own vocal booth.
Materials and Tools Needed
Before you start, gather all necessary materials and tools:
- Wooden Frames: For the booth structure.
- Acoustic Panels: To line the interior walls.
- Bass Traps: For corner placements.
- Soundproofing Materials: Such as mass-loaded vinyl or insulation.
- Foam Sheets: For additional sound absorption.
- Fabric: To cover acoustic treatments.
- Sealant and Weatherstripping: For soundproofing gaps.
- Tools: Screwdriver, saw, hammer, measuring tape, level, and drill.
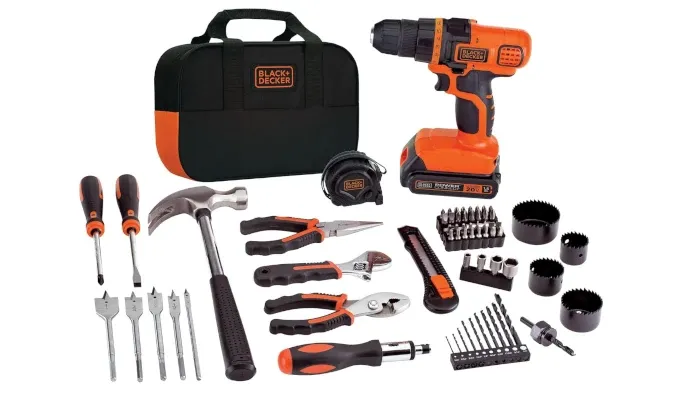
As an Amazon Associate I earn from qualifying purchases.
Planning and Design
Start with a vision. Sketch out the dimensions and layout of your vocal booth, taking inspiration from traditional wooden designs. Consider essential factors like ventilation, lighting, and door placement. Aim for a comfortable size, typically around 4x4 feet or larger if space allows.
If a full-sized wooden booth feels overwhelming, explore convenient alternatives like the Snap Studio Ultimate Vocal Booth - 360 Degree Reverb Isolation Shield. This portable option provides excellent reverb isolation and can easily fit into your studio setup. Whether you go for a traditional booth or a portable solution, you'll be on your way to creating a professional recording space.
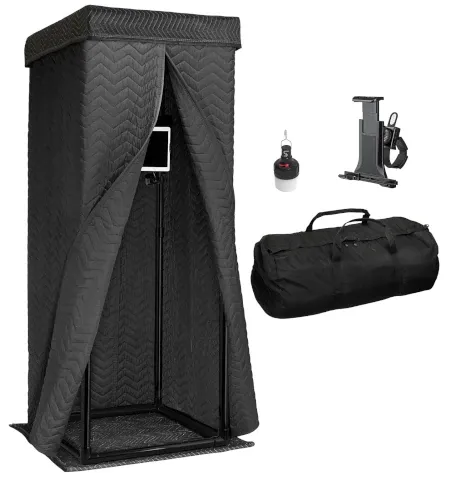
As an Amazon Associate I earn from qualifying purchases.
Constructing the Frame
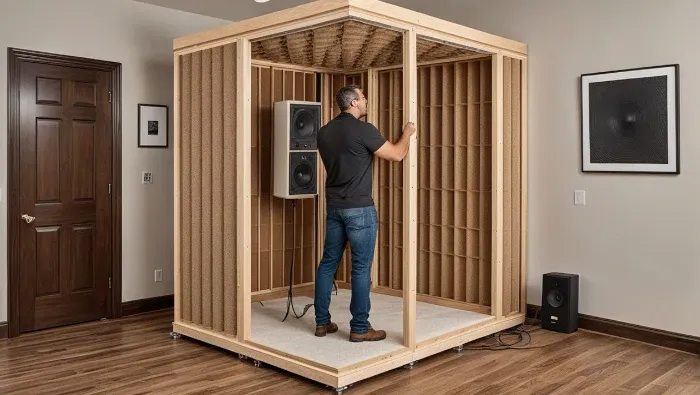
Creating a vocal booth requires careful planning and precise execution. Here’s a more detailed guide to help you through the process:
Measure and Cut Wood
- Gather Materials: You’ll need 2x4 wooden planks, a saw, measuring tape, and a pencil.
- Base and Top Frame: Cut four pieces of wood to form a square base and top frame. For a 4x4 feet booth, cut eight pieces, each 4 feet long.
- Vertical Supports: Cut eight vertical support pieces to the desired height of your booth, typically around 7 feet for comfortable standing room.
Assemble the Frame
- Base Frame: Lay out the four 4-foot pieces in a square and secure them at the corners with screws and a drill.
- Top Frame: Repeat the process to create an identical square frame.
- Attach Vertical Supports: Stand the vertical support pieces at each corner of the base frame and secure them with screws. Ensure they are upright using a level.
- Connect the Frames: Attach the top frame to the vertical supports, forming a sturdy rectangular structure.
Reinforce the Frame
- Secure Joints: Ensure all joints are tightly screwed together. Add extra screws at each joint if necessary.
- Check for Stability: Use a level to confirm that the frame is even and stable. Adjust and reinforce any wobbly sections.
Additional Tips
- Material Alternatives: For a more accessible approach, consider using PVC pipes for the frame. They are easier to cut and assemble.
- Portable Options: If constructing a wooden frame seems too complex, explore portable vocal booths like the Snap Studio Ultimate Vocal Booth - 360 Degree Reverb Isolation Shield for easy setup and excellent reverb isolation.
By following these steps and considering both traditional and modern alternatives, you'll be well on your way to creating a functional and professional vocal booth in your home studio.
Installing Soundproofing and Acoustic Treatments
- Line the Walls: Attach mass-loaded vinyl or insulation to the interior walls of the frame. This will help with soundproofing.
- Add Acoustic Panels: Cover the walls with acoustic panels or foam sheets. Secure them with adhesive or screws. Make sure to cover as much surface area as possible, focusing on the reflection points.
- Place Bass Traps: Install bass traps in the corners to absorb low frequencies. Ensure they are fitted snugly into the corners.
Door and Ventilation
- Install the Door: Use a solid-core door for better soundproofing. Add weatherstripping around the edges to seal gaps and prevent sound leakage.
- Ventilation: Proper ventilation is crucial to prevent the booth from becoming stuffy. Install a quiet ventilation fan or an air vent with sound baffles to ensure airflow without compromising sound isolation.
Flooring and Ceiling
- Flooring: Use a thick rug or carpet on the floor to absorb sound and reduce reflections. Rubber mats can also be used to isolate the booth from the floor.
- Ceiling: Attach foam panels or diffusers to the ceiling to manage sound reflections. Ensure the ceiling treatment complements the wall treatments.
Lighting and Cable Management
- Lighting: Install soft, non-intrusive lighting inside the booth. LED strips are a good option as they don’t produce much heat.
- Cable Management: Plan for microphone and headphone cables. Use cable clips or channels to keep them organized and out of the way.
Final Touches
- Test the Acoustics: Record some test audio and listen for any unwanted reflections or noise. Make adjustments to the acoustic treatments as needed.
- Personalize the Space: Add any personal touches such as decorative fabric, a comfortable mat, or even artwork to make the space inviting and inspiring.
By following these steps, you'll have a functional and effective vocal booth in your home studio, tailored to your specific needs. For a comprehensive guide on starting your home studio, refer to First Steps on How to Build an Audio Home Studio .
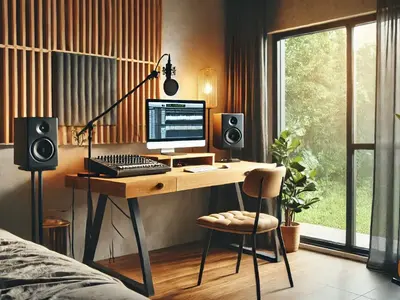
Setting Up Equipment
Setting up the right equipment in your vocal booth is essential for achieving professional-quality recordings. Here's a guide to help you choose and position the key pieces of equipment for optimal sound.
Essential Equipment
To get started, you'll need the following essential equipment:
As an Amazon Associate I earn from qualifying purchases.
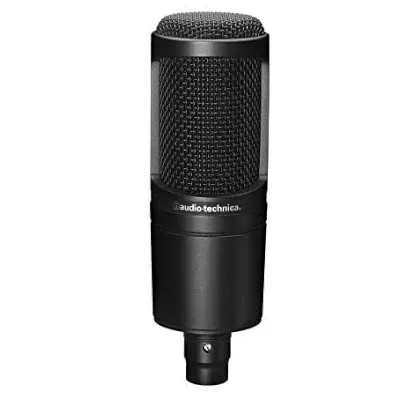
- Microphone: A good quality condenser microphone is ideal for capturing vocals with clarity and detail. Popular choices include the Audio-Technica AT2020 and the Rode NT1-A.
As an Amazon Associate I earn from qualifying purchases.
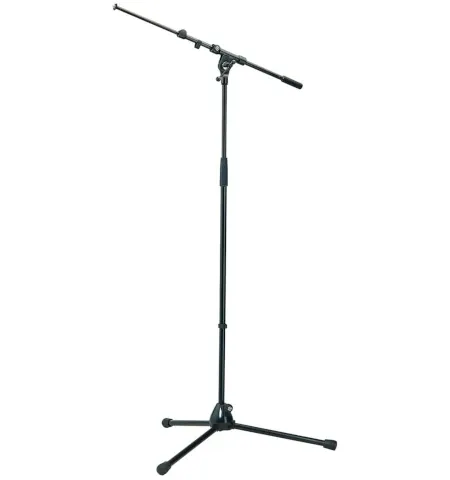
- Microphone Stand: A sturdy, adjustable stand is crucial for positioning your microphone correctly.
As an Amazon Associate I earn from qualifying purchases.
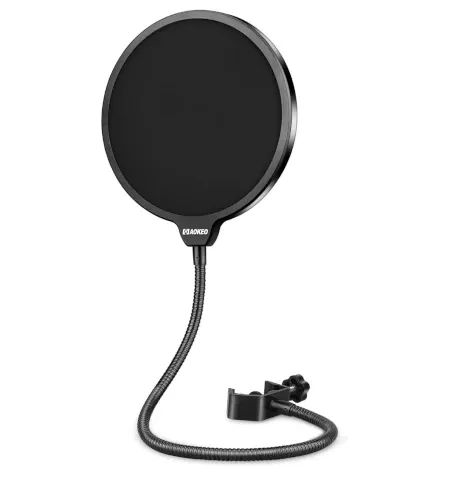
- Pop Filter: This helps reduce plosive sounds (like "p" and "b") and protects the microphone from moisture.
- Headphones: Closed-back headphones are preferred to prevent sound leakage. Models like the Audio-Technica ATH-M50x are highly recommended.
As an Amazon Associate I earn from qualifying purchases.
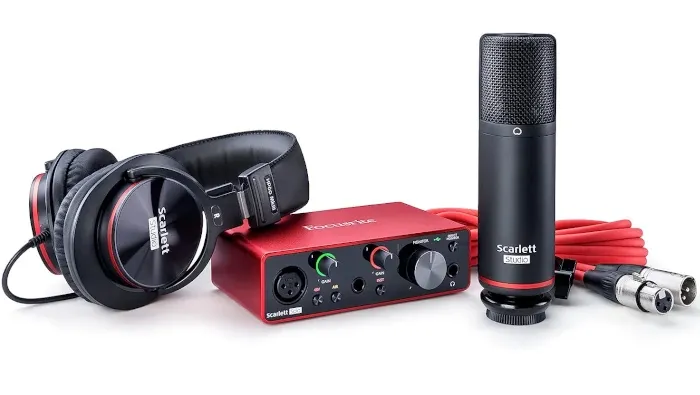
- Audio Interface: This device connects your microphone to your computer and converts analog signals to digital. The Focusrite Scarlett 2i2 is a popular choice for home studios.
- Computer and DAW: A reliable computer with digital audio workstation (DAW) software, such as Ableton Live or FL Studio, is essential for recording and editing.
Microphone Placement
Proper microphone placement is crucial for capturing the best sound:
- Height and Distance: Position the microphone at mouth level, about 6-12 inches away from the singer. Use the pop filter to maintain consistent distance.
- Angle: Angle the microphone slightly upwards or downwards to avoid capturing breath noises directly.
- Shock Mount: Use a shock mount to isolate the microphone from vibrations and handling noise.
Pop Filter Positioning
Attach the pop filter to the microphone stand, placing it 2-3 inches away from the microphone. This distance helps effectively reduce plosive sounds without affecting the vocal clarity.
Headphone Setup
Connect your headphones to the audio interface. Ensure they are comfortable and fit well to avoid discomfort during long recording sessions. Use a headphone amplifier if necessary to ensure proper volume levels.
Audio Interface Connection
- Connect Microphone: Plug the microphone into the audio interface using an XLR cable.
- Connect to Computer: Use a USB cable to connect the audio interface to your computer.
- Adjust Settings: Configure the audio interface settings in your DAW software. Set the input gain to avoid clipping while ensuring a strong signal.
DAW Configuration
- Create a New Project: Open your DAW and create a new project or session.
- Set Up Tracks: Add a new audio track for your vocal recordings. Arm the track for recording.
- Check Levels: Perform a sound check to ensure the input levels are set correctly. Adjust the gain on your audio interface if necessary.
Acoustic Considerations
Even with good equipment, acoustics play a vital role in sound quality:
- Reflection Filters: Consider using a reflection filter behind the microphone to further reduce room reflections.
- Monitor Levels: Keep your monitor levels low to avoid feedback or bleed into the microphone.
Maintenance and Care
- Regular Cleaning: Clean your microphone and pop filter regularly to maintain hygiene and performance.
- Cable Management: Keep cables organized and avoid tangling to prolong their lifespan and ensure a tidy workspace.
- Software Updates: Regularly update your DAW software and audio interface drivers for optimal performance and compatibility.
By setting up your equipment correctly, you can ensure that your vocal booth delivers the best possible recording quality. For more tips on choosing and buying home studio equipment, visit How to Buy Home Studio Equipment Spending Less .
Final Touches and Maintenance
After setting up your vocal booth and equipment, adding final touches and maintaining your space will ensure a comfortable, efficient, and long-lasting recording environment. Here’s how to optimize and care for your vocal booth.
Personalizing Your Space
Creating a welcoming and inspiring environment can boost your creativity and comfort during recording sessions:
- Decor and Lighting: Add soft, ambient lighting like LED strips or small lamps to create a relaxed atmosphere. Avoid harsh lighting that can cause glare or discomfort.
- Comfort Items: Include a small rug, a stool, or a comfortable chair to make the booth more inviting. These can also help reduce fatigue during long sessions.
- Aesthetics: Personalize the space with posters, artwork, or motivational quotes. This not only makes the booth visually appealing but also adds a personal touch that can inspire your performances.
Optimizing Acoustics
Even after initial setup, small tweaks can enhance the acoustic quality of your vocal booth:
- Additional Acoustic Panels: If you notice any remaining reflections or echoes, add more acoustic panels or foam to the walls and ceiling. Pay special attention to the areas directly behind and beside the microphone.
- Testing and Adjusting: Regularly test the acoustics by recording short vocal samples. Listen for any issues and make adjustments as needed. Small changes in panel placement or microphone position can make a big difference.
Cable Management
A clutter-free booth is essential for both safety and efficiency:
As an Amazon Associate I earn from qualifying purchases.
- Cable Organizers: Use cable ties, clips, or channels to keep microphone and headphone cables neatly arranged. This prevents tangling and reduces the risk of tripping.
- Accessibility: Ensure that cables are long enough to allow for movement within the booth but not so long that they create excess slack. Keep all connections secure to avoid interruptions during recording.
Routine Maintenance
Maintaining your vocal booth ensures it remains in top condition and prolongs the life of your equipment:
- Regular Cleaning: Dust and clean the booth regularly. Use a soft cloth to wipe down surfaces, and vacuum any rugs or carpets. Clean the pop filter and microphone with a gentle disinfectant to prevent the buildup of germs and maintain hygiene.
- Equipment Check: Periodically check all equipment for signs of wear or damage. Inspect cables for fraying and ensure all connections are tight. Replace any faulty components immediately to avoid impacting your recordings.
- Software Updates: Keep your recording software and audio interface drivers up to date. Regular updates can fix bugs, improve performance, and add new features that enhance your recording process.
Environmental Control
Maintaining a consistent environment in your vocal booth can improve recording quality:
- Temperature and Humidity: Keep the booth at a comfortable temperature. Extreme heat or cold can affect both your performance and the equipment. Use a dehumidifier if necessary to control humidity levels, as high humidity can damage electronic equipment and affect sound quality.
- Ventilation: Ensure the booth is well-ventilated. A small, quiet fan or an air vent can help circulate air and prevent the booth from becoming stuffy.
Long-Term Care
To ensure your vocal booth continues to perform well over time, consider these long-term care tips:
- Seasonal Checks: Perform a thorough inspection of your vocal booth and equipment at least once every season. Look for any signs of wear or changes in acoustic performance and address them promptly.
- Professional Assessment: If possible, have an audio professional assess your vocal booth setup periodically. They can provide expert advice on further improvements and ensure your booth meets professional standards.
By focusing on these final touches and maintenance tips, you'll create a vocal booth that's not only functional and efficient but also a pleasure to use. For more comprehensive guidance on home recording, refer to 3 Steps to Record High-Quality Audio on Laptop .
Rodrigo Marques
Rodrigo Marques, founder of Home Studio Start, is a music production veteran with over 25 years of experience. Since 1997, he has mastered tools like Sound Forge, Samplitude Pro, and VST plugins, producing albums for emerging artists globally. Creator of the innovative Formula HSS for mixing and mastering, Rodrigo has empowered thousands through online courses and his ebook, Home Studio Start. Dedicated to democratizing music production, he equips aspiring artists with skills for professional-grade music and sustainable careers.
About the author