HSS Podcast - Build Your Dream Home Studio on a Budget: The Essential Gear Guide for Professional Sound Without Breaking the Bank!
HSS Staff
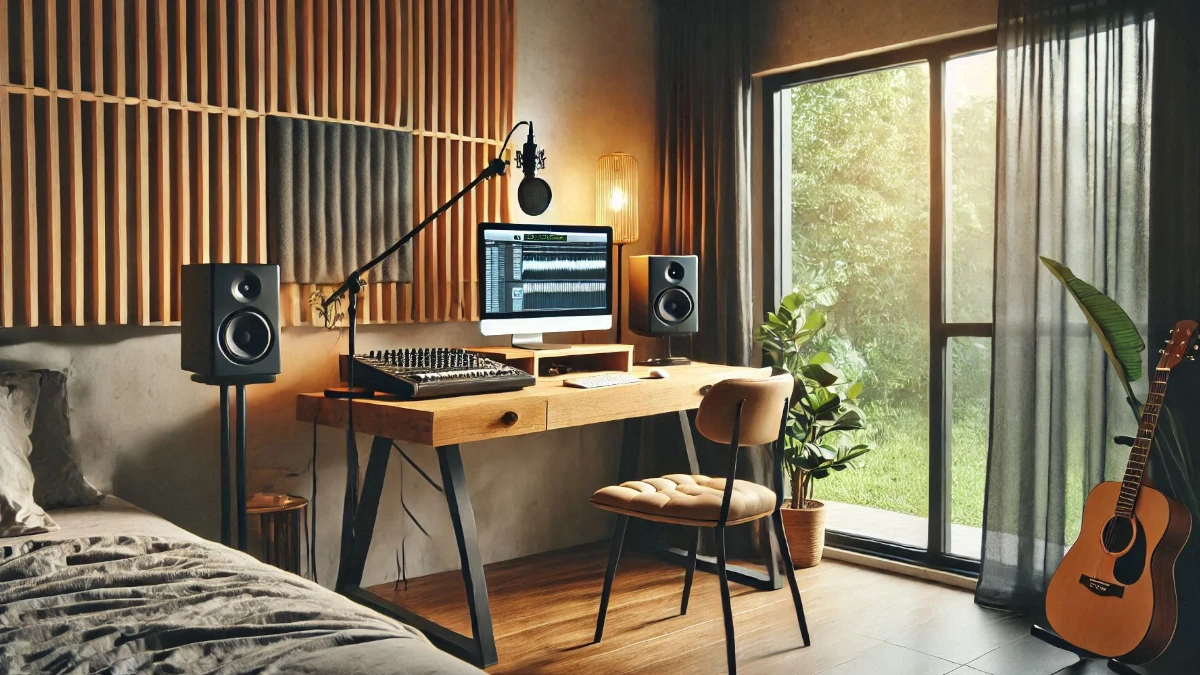
Have you ever dreamed of creating chart-topping tracks right from the comfort of your own home? Well, it’s not just a fantasy! With the right budget-friendly equipment, you can transform your humble abode into a fully functional recording studio. Whether you’re an aspiring musician, podcaster, or simply a lover of sound, setting up a home studio doesn’t have to break the bank. Imagine having the power to capture your creativity, experiment with different sounds, and produce high-quality audio without sacrificing your finances. Sounds exciting, right? If you’re ready to dive into the world of home recording but terrified of the price tags generally associated with studio gear, you’re in the right place! Here, we’ll explore some incredible budget-friendly options that provide real value without compromising on quality. Get ready to unleash your inner producer with gear that fits your wallet and your creative ambitions!
1. Essential Audio Interfaces for Home Recording
When setting up your home recording studio, one of the first pieces of equipment you need to consider is an audio interface. This nifty device is the bridge between your instruments, microphones, and your computer, transforming analog signals into digital ones for recording. So, why should you focus on getting a quality audio interface, especially on a budget? Let’s break it down!
Understanding Audio Interfaces
Audio interfaces come in various shapes and sizes, but they all serve a common purpose: to improve sound quality and make your recording process smoother. Think of them as the Swiss Army knife of home studios! They provide better preamps than your computer, reduce latency, and often come with additional features like MIDI input, which is super beneficial for electronic musicians.
Budget-Friendly Recommendations
Many fantastic audio interfaces won’t break the bank. Here are a couple of budget-friendly options that have earned rave reviews:
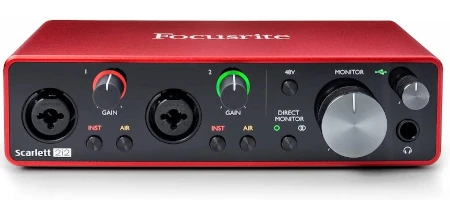
- Focusrite Scarlett 2i2 (3rd Gen) – This interface is a favorite among beginners and pros alike. It offers two high-quality mic preamps, which means you can record vocals and instruments simultaneously. Plus, it’s compact and easy to use!
- Behringer UMC22 – If you’re really tight on budget, the UMC22 is an excellent entry-level option. With one mic preamp and one instrument input, it’s perfect for singer-songwriters just starting out.
Practical Tips for Choosing an Audio Interface
When selecting an audio interface, consider the following:
- Inputs and Outputs: Think about how many microphones or instruments you’ll be recording at once. If you plan to record a full band, look for interfaces with multiple inputs.
- Compatibility: Ensure the audio interface works with your recording software (DAW) and your computer’s operating system.
- Portability: If you plan on recording on the go, a compact and lightweight model might be more suitable.
In essence, investing in a quality audio interface is a crucial step for anyone serious about home recording. It enhances your sound and offers the flexibility you need to bring your musical visions to life.
Microphones on a Budget: Types and Recommendations
When setting up the best budget-friendly equipment for a home recording studio, one of the most crucial pieces of gear you’ll need is a microphone. The right mic can make a world of difference in the quality of your recordings, and the good news is, you don’t have to break the bank to find a fantastic option!
Dynamic Microphones
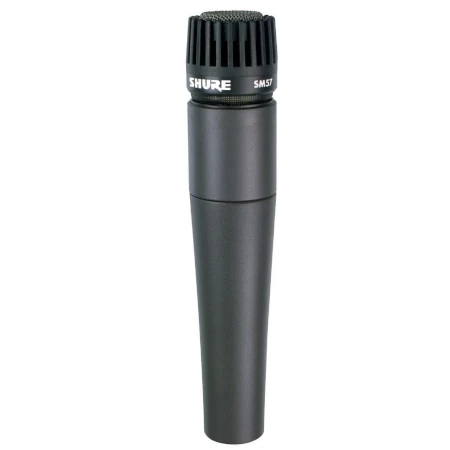
First up, let’s talk about dynamic microphones. These are typically more durable and handle high sound pressure levels like a champ, making them perfect for live performances and recording loud sources such as drums and guitar amps. A great budget-friendly choice is the Shure SM57. This legendary mic is known for its versatility and clarity, and you can often snag one for around $100. It’s a go-to for many home studios because you can use it for vocals, instruments, and even as a snare mic!
Condenser Microphones
If you’re looking for something that captures the nuances of vocals and acoustic instruments, then condenser microphones are your best bet. They’re more sensitive and provide a broader frequency response. The Audix M1250B is a solid option that you can usually find for under $200. It’s compact, works great for vocals, and is perfect for home studio setups where space might be tight.
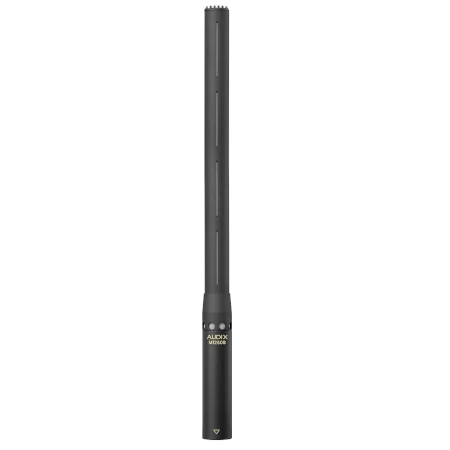
The Audix M1250B is indeed a long and thin microphone, often categorized as a miniature condenser microphone. Its compact design makes it highly versatile for various recording situations, such as overheads, choir miking, or instrument miking, but it can still be used for vocals in certain scenarios.
However, this design might not be ideal for lead vocal recording in a studio setting. Here’s why:
- Application Focus: The M1250B is typically designed for precise miking of instruments, room ambience, or group performances rather than solo vocalists.
- Directional Characteristics: Depending on the capsule, it may prioritize pickup patterns (like hypercardioid or omnidirectional) that are less common in traditional vocal microphones, which typically use cardioid patterns.
- Studio Expectations: Studio-grade vocal microphones often have a larger diaphragm, which enhances warmth and clarity for vocals.
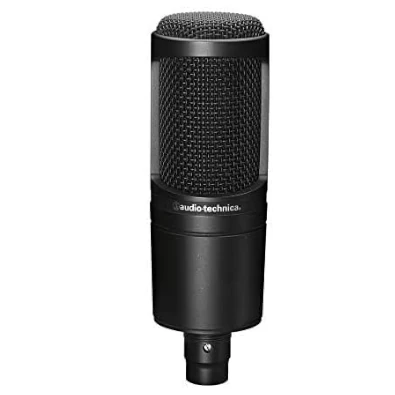
If you’re looking for a dedicated vocal condenser microphone, options like the Audio-Technica AT2020, Rode NT1-A, or Shure SM27 may be more traditional and versatile choices for home studios. If you still want to use the Audix M1250B, ensure it fits the sound you’re trying to achieve through testing!
USB Microphones
For those just getting started or needing something super convenient, USB microphones are a game-changer. They plug directly into your computer, making setup a breeze. The Blue Yeti is a fan favorite, often available for around $130. It features multiple polar patterns, making it incredibly versatile for everything from podcasting to recording music.
In conclusion, investing in a good microphone doesn’t have to mean spending a fortune. By choosing wisely among dynamic, condenser, and USB options, you can enhance your home recording studio’s sound quality without burning a hole in your wallet. Happy recording!
3. Affordable Studio Monitors and Headphones for Mixing
When it comes to setting up a home recording studio, investing in affordable studio monitors and headphones is crucial for achieving professional-sounding mixes without breaking the bank. Let’s dive into why these two elements are essential and highlight some budget-friendly options that can elevate your mixing game.
Why Studio Monitors Matter
Studio monitors are designed to provide a flat frequency response, which means they reproduce sound accurately. This accuracy is vital when mixing music because it allows you to hear your tracks as they truly are, rather than colored by the headphones or speakers you might normally use.
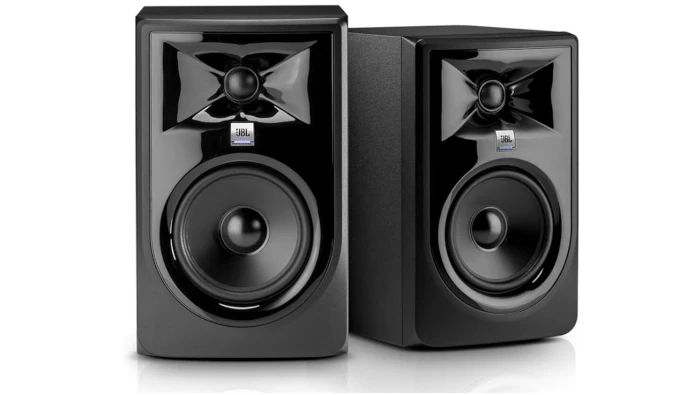
For a budget-friendly option, consider the JBL Professional 305P MkII. Priced around $150 each, these monitors have received rave reviews for their clear sound and impressive stereo imaging. They also feature a built-in room tuning capability, allowing you to adjust the sound according to your studio’s acoustics.
Headphones: The Unsung Heroes
While monitors are fantastic, sometimes you need to mix quietly, especially if you’re working late at night. That’s where good headphones come in. They can help you catch details you might miss with speakers.
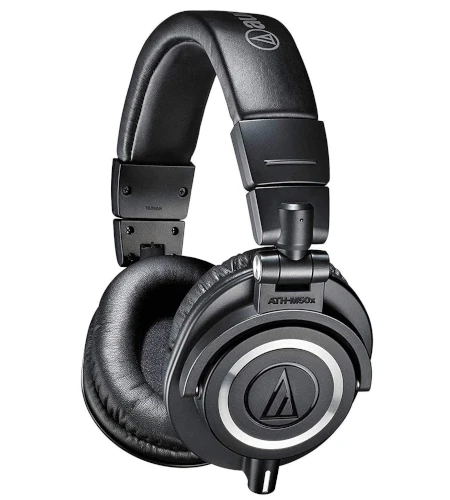
The Audio-Technica ATH-M50x is a popular choice among audio professionals and enthusiasts alike. They provide excellent sound isolation and clarity for about $150. These headphones are perfect for tracking vocals or instruments, ensuring you hear every nuance without interference.
Practical Tips for Mixing
- Listen to Reference Tracks: Always have a few reference tracks in your genre handy to compare your mixes against. This will help you make informed decisions while mixing.
- Room Treatment: If possible, invest in some basic acoustic treatment for your room. This will enhance the performance of your monitors, allowing for a more accurate mixing environment.
- Take Breaks: Your ears can fatigue quickly. Take regular breaks to maintain your critical listening skills.
In conclusion, investing in affordable studio monitors and headphones like the JBL 305P MkII and Audio-Technica ATH-M50x can significantly impact your mixing quality. By equipping your home studio with these essential tools, you’ll be well on your way to creating professional-sounding tracks without emptying your wallet!
4. Budget Digital Audio Workstations (DAWs) for Beginners
When diving into the world of home recording, one of the most crucial components you’ll need is a Digital Audio Workstation (DAW). Think of a DAW as your command center for creating and editing music. The good news? You don’t need to break the bank to get started! There are plenty of budget-friendly DAWs that pack a punch without emptying your wallet.
Top Budget DAWs to Consider
Here are a few standout options that cater to beginners while offering robust features:
- GarageBand: If you’re a Mac user, GarageBand is a fantastic option that comes free with your computer. It’s user-friendly, has a plethora of built-in instruments, and allows for easy recording and editing. Plus, you can easily upgrade to Logic Pro if you outgrow it!
- Audacity: This is a free, open-source DAW that’s perfect for those just starting out. While it might not have the fancy features of some paid options, it’s excellent for basic recording and editing. Plus, it’s available on multiple platforms—Windows, Mac, and Linux.
- Reaper: With an incredibly affordable license fee, Reaper is a powerful DAW that offers a full-featured trial period. Its interface may take a little getting used to, but it’s highly customizable. Many users appreciate its efficiency and extensive plugin support.
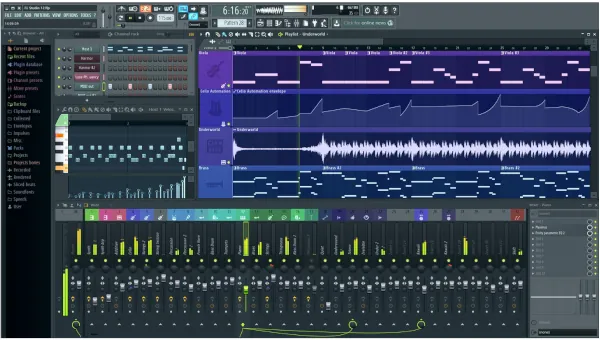
- FL Studio Fruity Edition: For electronic music lovers, the Fruity Edition of FL Studio is a great starter option. While it’s not free, it’s reasonably priced and offers a lot of creative tools. You can create beats, compose, and mix all in one place!
Practical Tips for Choosing Your DAW
1. Identify Your Needs: Are you looking to record live instruments, or are you more focused on beat-making? Your choice of DAW should align with your musical goals.
2. Try Before You Buy: Many DAWs offer trial versions. Take advantage of this to find out which interface you’re most comfortable with.
3. Join Online Communities: Forums and groups dedicated to specific DAWs can be invaluable resources. You’ll find tutorials, tips, and support from fellow users.
By selecting the right budget DAW, you’re setting yourself up for success in your home recording studio journey. Remember, even the most affordable options can lead to incredible music production—just look at countless artists who have created chart-topping hits using simple setups!
5. Inexpensive Acoustic Treatment Solutions
Creating a great-sounding home recording studio doesn’t just rely on amazing gear; it also requires attention to your room’s acoustics. You can have the best microphones and audio interfaces, but if your sound is bouncing off walls like a pinball, your recordings will suffer. Luckily, there are plenty of inexpensive acoustic treatment solutions that can transform your space without breaking the bank!
Understanding Acoustic Treatment
Acoustic treatment involves controlling how sound behaves in your room. This can mean reducing echoes, controlling bass buildup, and managing sound reflections. The good news? You don’t need to spend a fortune on fancy panels to achieve this!
DIY Acoustic Panels
One of the most effective and budget-friendly solutions is to make your own acoustic panels. All you need are some wooden frames, insulation material (like rockwool or foam), and fabric to cover them. Simply build a frame, fill it with insulation, and wrap it in your chosen fabric. Place these panels at first reflection points—like on walls beside your recording area—to absorb sound and reduce echo.
Use Rugs and Curtains
Another simple tip is to utilize soft furnishings to dampen sound. Thick rugs can help absorb sound waves and reduce reflections from hard floors. Similarly, heavy curtains can be hung over windows to minimize sound leakage and improve overall acoustics. They’re affordable options that also add a cozy vibe to your studio!
Bookshelves and Furniture
Believe it or not, your existing furniture can act as effective sound absorbers. Strategically placing bookshelves filled with books or even clothes can help diffuse sound waves, breaking up reflections and creating a more balanced acoustic environment. Plus, it’s a practical solution that doesn’t require any extra spending.
By implementing these inexpensive acoustic treatment solutions, you’ll elevate your home recording studio’s sound quality significantly without draining your wallet. Remember, a well-treated room can make even budget-friendly equipment shine!
Conclusion
As we’ve explored in this journey through the realm of home recording studios, it’s clear that you don’t have to break the bank to create high-quality music. By investing in budget-friendly equipment, you can achieve impressive results without sacrificing sound quality or your passion for music creation. From versatile audio interfaces and reliable microphones to quality headphones and DAWs that won’t drain your wallet, each piece of equipment plays a crucial role in shaping your sound.
Remember, starting your home studio is not just about the price tag—it’s about understanding your needs and leveraging what you can to your advantage. Selecting the right tools tailored to your production style can elevate your music without giving you a headache when it comes to finances. Whether it’s a USB microphone that captures crisp vocals or affordable monitors that provide accurate sound, each choice contributes to your creative process.
Moreover, always keep in mind the importance of acoustics and sound treatment. Even on a budget, making improvements to your recording environment can enhance your final product significantly. Simple DIY solutions and strategic placements of furniture can further refine your sound quality at minimal cost.
So, what are you waiting for? Dive into the vibrant world of music production today! Take a good look at your budget, make a plan, and start gathering your equipment piece by piece. Transform that empty corner of your room into a thriving home studio. With the right tools, commitment, and creativity, you have the potential to produce tracks that could compete in the vast world of music. If you’re ready, put on those headphones, hit the record button, and let your musical journey begin!
Ready to make your home studio dreams a reality? Get started by checking out the budget-friendly options we discussed and share your journey with us! Happy recording!