
Picture this: You’re standing in the studio, headphones on, surrounded by a tidal wave of raw audio tracks. Each one holds its own magic, but together they need a touch of alchemy to truly shine. Ever wonder how to transform that chaotic mix into a beautifully synchronized masterpiece? That’s where the magic of equalization comes in! Whether you’re a seasoned producer or just starting out on this exciting musical journey, mastering EQ techniques is your golden ticket to producing tracks that captivate and inspire. From shaping the brightest highs to digging into the deepest lows, EQ lets you sculpt each track to perfection. Intrigued? Read on, and we’ll dive into the world of EQ, offering you practical tips, real-world examples, and insider secrets to make your music stand out in the mix. Trust us, you won’t want to miss this harmony-packed adventure!
1. Understanding Frequency Ranges and Their Role in Mixing
Grasping the concept of frequency ranges is essential in the art of mixing, as it lays the foundation for effective equalization of individual tracks. Frequencies in music are divided into distinct ranges, each carrying its own unique characteristics and emotional impact. This understanding can transform your mix from muddled to magical.
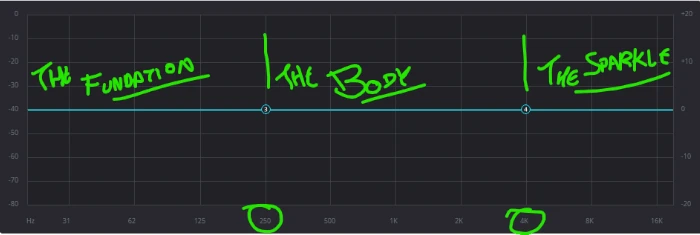
Low Frequencies: The Foundation
The low-frequency range, typically from 20 Hz to 250 Hz, is where the bass and kick drums reside. This range is crucial for providing the track with warmth and power. However, too much energy here can make your mix sound muddy. For instance, when mixing a bass guitar, cutting around 50-80 Hz can reduce muddiness, while a slight boost around 100 Hz can add punch.
Mid Frequencies: The Body
Ranging from 250 Hz to 4 kHz, the mid frequencies are where most instruments find their body and presence. This range is often where clarity issues arise. For example, if a guitar is fighting with vocals for space, a cut around 300-500 Hz on the guitar can help the vocals stand out without losing the guitar’s richness.
High Frequencies: The Sparkle
High frequencies, from 4 kHz to 20 kHz, bring brightness and air to your mix. This is where the hi-hats and cymbals shine. However, excessive boosting can lead to a harsh and fatiguing sound. A gentle boost at 10 kHz can add shine to vocals, but be cautious to avoid sibilance.
By understanding and manipulating these frequency ranges, you can craft a balanced mix that allows each element to shine. Always remember that subtlety is key; small adjustments can lead to significant improvements in clarity and depth.
2. Use of Parametric EQ and Its Advantages in Track Mixing
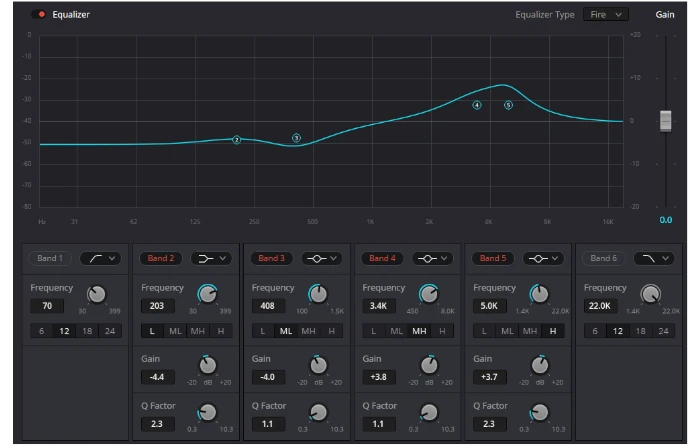
Parametric EQ is an indispensable tool when it comes to equalizing individual tracks in a mix. Unlike graphic equalizers, which offer fixed frequency bands, a parametric EQ provides the flexibility to adjust the frequency, bandwidth (Q factor), and gain, giving you precise control over the sound.
What Makes Parametric EQ Special?
Imagine you’re working with a vocal track that’s sounding a bit muddy. With a parametric EQ, you can pinpoint the exact frequency range, let’s say around 250 Hz, that’s causing the issue. By applying a gentle cut, you can clean up the muddiness without affecting the rest of the vocal range. This is especially useful in complex mixes where clarity is crucial.
Practical Tips for Using Parametric EQ
Here’s a practical tip: when working with instruments like guitars, identify the “sweet spot” frequencies that highlight the desired tonal qualities. For instance, boosting around 3-5 kHz can help the guitar cut through the mix, while a slight attenuation around 200-400 Hz might reduce any unwanted boxiness.
Another trick is using a parametric EQ to carve out space for different instruments. If a bass guitar and kick drum are clashing, you might cut around 60-100 Hz on the bass while boosting the same range on the kick, ensuring each element shines without fighting for attention.
Real-Life Application
Consider the mixing process of a live band recording. The parametric EQ allows engineers to tailor each track, like the snare drum or lead guitar, ensuring they complement rather than compete with each other. This results in a harmonious and dynamic mix that retains the energy and excitement of the live performance.
In summary, the versatility and precision of a parametric EQ make it a powerful ally in your mixing toolkit, enabling you to sculpt sounds with surgical accuracy and elevate the overall quality of your tracks.
3. Avoiding Frequency Masking and Achieving Clarity
Achieving clarity in your mix can often feel like balancing on a tightrope. One of the biggest culprits that muddle up the clarity is frequency masking. Think of frequency masking like two people talking over each other; it gets hard to understand either one. In music production, this happens when different instruments or vocals occupy overlapping frequency ranges, making it difficult for the listener to distinguish individual elements.
To tackle this, start by identifying which tracks are masking each other. A practical tip here is to solo each track with others to hear exactly where the overlaps occur. For example, the bass guitar and kick drum often compete for space in the low-frequency range. Use a spectrum analyzer to visually catch these overlaps and make educated decisions on EQ adjustments.
One effective technique is to apply a slight cut in the frequency range of one instrument to make room for another. For example, if both your kick drum and bass guitar are fighting around the 100 Hz area, you could carve out a notch at that frequency on the bass guitar, allowing the kick to shine through. This subtle tweak can make your mix significantly clearer without having to sacrifice volume or impact.
Another strategy involves using sidechain compression, especially with dynamic EQs. Set up a compressor on the bass track that’s triggered by the kick drum; this ensures the bass lowers in volume whenever the kick hits, allowing the kick to punch through the mix. Remember, though, this technique requires some finesse to avoid unnatural pumping sounds.
Experimentation is key. Each mix is different, and understanding the unique frequency content of your tracks will guide you in making the best EQ decisions. With practice, avoiding frequency masking will become second nature, leading to crisp, clear mixes that allow every instrument to be heard.
4. Using Reference Tracks for EQ Matching
Ever wondered how your favorite tracks achieve such a polished and balanced sound? The secret often lies in the magic of EQ matching with reference tracks. This technique is a game-changer in the realm of equalizing individual tracks in a mix, offering a roadmap to achieving that professional sound you crave.
Understanding EQ Matching
EQ matching involves analyzing the frequency spectrum of a reference track and applying similar EQ settings to your mix. This doesn’t mean copying someone else’s work verbatim but rather using their sonic blueprint as inspiration. Think of it as having a mentor guide you through the mixing process.
Practical Steps for EQ Matching
Start by selecting a well-mixed reference track in the same genre as your project. Import it into your DAW (Digital Audio Workstation) alongside your mix. Next, use a plugin like iZotope’s Ozone Match EQ or FabFilter Pro-Q to analyze the frequency spectrum of the reference track. These tools can create an EQ curve that mimics the tonal balance of the reference.
Apply this curve to your mix, but with caution. Every track is unique, and while reference tracks provide guidance, they shouldn’t dictate your entire mix. Listen critically and make adjustments where necessary, ensuring your mix retains its own identity.
Real-Life Application
For instance, if you’re mixing a pop vocal track, reference a hit song with similar vocal qualities. Notice how the high-end sparkle or mid-range presence is crafted, then apply those insights to your EQ settings. This approach can help you achieve clarity and separation, making your vocals shine through the mix.
By using reference tracks for EQ matching, you’re not just mimicking success; you’re learning from it. Embrace this technique to elevate your mixing skills and achieve a sound that resonates with listeners.
5. Tips for EQ
Understanding EQ Basics
Equalization, or EQ, is like a magic wand for your mix. It shapes the tone of individual tracks, allowing each element to shine without overpowering the others. Imagine your mix as a jigsaw puzzle; EQ helps each piece fit perfectly without overlapping.
Use High Pass Filters Wisely
A practical tip is to apply high-pass filters to remove unnecessary low-end frequencies from non-bass instruments. For instance, adding a high-pass filter to vocals can clear up the mix by eliminating rumble and boominess. This simple step can drastically improve clarity.
Identify Frequency Ranges
Every instrument occupies a certain frequency range. Understanding these ranges is crucial. For example, the kick drum typically sits around 50-100 Hz, while vocals might be more prominent around 1-3 kHz. By knowing where each instrument lives, you can use EQ to carve out space for each element, reducing overlap and muddiness.
Cut Before You Boost
When equalizing, consider cutting frequencies before boosting others. If a track sounds muddy, try reducing the offending frequencies. For instance, if a guitar sounds too harsh, a gentle cut around 2-4 kHz can soften it. This approach often results in a more natural sound and prevents distortion.
Experiment and Trust Your Ears
Finally, don’t forget that EQ is as much about experimentation as it is about science. Trust your ears and make adjustments based on what sounds right to you. Each mix is unique, so while these tips provide a foundation, the best EQ decisions often come from your personal touch and intuition.
Conclusion: Master the Art of Equalizing Your Mix
In conclusion, equalizing individual tracks within a mix is not only a pivotal skill but also an art form that can significantly elevate your music productions. By understanding the core principles and techniques of equalization, you can sculpt each instrument and vocal track to create a harmonious and polished mix that truly shines.
Throughout this discussion, we’ve explored several key points. First, recognizing the frequency spectrum is essential. Knowing the roles and characteristics of low, mid, and high frequencies allows you to make informed decisions about which elements should dominate certain frequency ranges.
Then, we delved into the powerful equalization tools at your disposal. From parametric EQs to graphic EQs, each offers unique functionalities suitable for various scenarios. Employing techniques such as cutting unnecessary frequencies, boosting those that emphasize the unique character of your track, and using high-pass and low-pass filters are vital actions that assure clarity and prevent muddiness in your mix.
We emphasized the importance of context; always consider how each track fits within the whole mix. What works for a snare drum in one song might not work in another, so trust your ears and let them guide you. Remember to balance between artistic intuition and technical precision.
Analog examples, such as the legendary EQ manipulations used in iconic albums, showcased how timeless these skills are. Techniques like subtractive EQ to clean up recordings or additive EQ to infuse warmth and brightness illustrate the impact of thoughtful equalizing.
Lastly, practice and refine your approach by constantly listening to and analyzing professional mixes. Apply these techniques to your projects, experiment with different settings, and don’t shy away from using reference tracks to gauge your progress.
Now, it’s time to take action. Dive into your DAW, play around with the EQ settings, listen intently, and see the transformation in your mixes. Share your journey and creations with the world, because your newfound skills are bound to resonate with listeners. Ready to elevate your tracks? Let the equalizing begin!