
Ever wondered why some tracks sound so polished and pristine compared to others? It might just be that secret sauce every pro mixer swears by: compression. Whether you’re new to the world of music production or you’ve been around the mixing board a few times, understanding how to use compression effectively in mixing can drastically elevate your sound from “meh” to marvelous. Imagine a symphony where every instrument plays in perfect harmony, every note is crisp, and nothing gets drowned out—compression is the magic wand that can help conjure that balance.
For those new to the studio, compression might sound like another intimidating technical jargon. Yet, once unraveled, it’s akin to discovering a golden ticket in your audio Willy Wonka factory. This tool can add punch to your drums, smooth out your vocals, and glue your entire mix together, making it sound as though each element was always meant to coexist. It’s not just about controlling dynamic range; it’s about painting with sound, adding depth and color to each frequency.
You’re about to dive into the art and science of compression with easy-to-grasp examples, invaluable tips, and real-world applications. So, ready to transform your tracks into sonic masterpieces? Read on, and let’s demystify the hidden hero of mixing that can propel your music production skills to new heights!
Understanding Compressor Parameters and Settings
Compression is one of the most powerful tools in a mixing engineer’s arsenal, and understanding its parameters can unlock a world of possibilities in your music production. At its core, a compressor is used to control the dynamic range of audio signals, making the loud parts quieter and the quiet parts louder. Let’s dive into the essential parameters and settings that will help you use compression effectively in mixing.
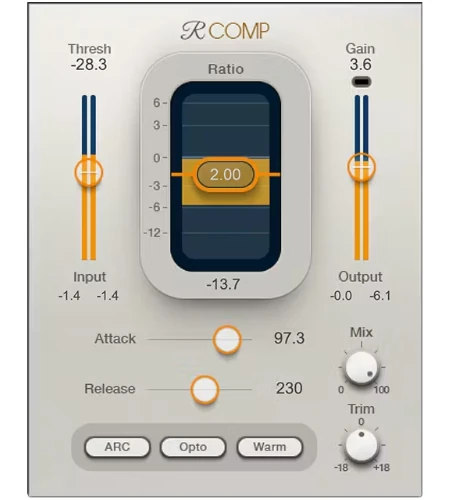
Threshold
The threshold is the level above which the compressor starts to act. Imagine you’re mixing a vocal track that occasionally peaks too high. By setting the threshold just above the average level, the compressor can tame those peaks without affecting the rest of the performance. For instance, if your vocal peaks at -3dB, setting the threshold at -5dB can ensure that only the excessive peaks are compressed.
Ratio
The ratio determines how much compression is applied once the signal surpasses the threshold. A 4:1 ratio means that for every 4dB the input exceeds the threshold, the output will only increase by 1dB. A higher ratio like 10:1 can be used for a limiting effect, while lower ratios, such as 2:1, provide a more subtle compression. Experiment with different ratios depending on whether you want to maintain dynamics or achieve a more controlled sound.
Attack and Release
Attack time controls how quickly the compressor responds to signals above the threshold. A fast attack can quickly tame transient peaks, making it useful for drums. Conversely, a slow attack allows some transients to pass, preserving the initial punch of the sound. Release time, on the other hand, determines how fast the compressor stops acting after the signal falls below the threshold. Fast release times can make a track sound livelier, while slower releases create a smoother, more natural sound. For example, when compressing a snare drum, a fast attack and quick release can add punch and maintain rhythm.
Make-up Gain
Compression often reduces overall volume, and make-up gain compensates for this reduction. After setting your compression parameters, use make-up gain to bring the level back up to match the rest of your mix. This ensures that the compressed track sits well within the mix without losing its presence.
Understanding these parameters is crucial to using compression effectively in mixing. By mastering these settings, you can enhance your tracks, giving them clarity and punch while maintaining their emotional impact. Remember, the key is to listen critically and adjust the parameters to suit the specific needs of your mix.
2. Different Types of Compressors and Their Applications
Compressors are a quintessential tool in the mixing process, each type offering a unique flavor and application. Understanding their nuances can elevate your mix from good to great. Let’s dive into the different types of compressors and how they can be used effectively in your mixes.
VCA Compressors
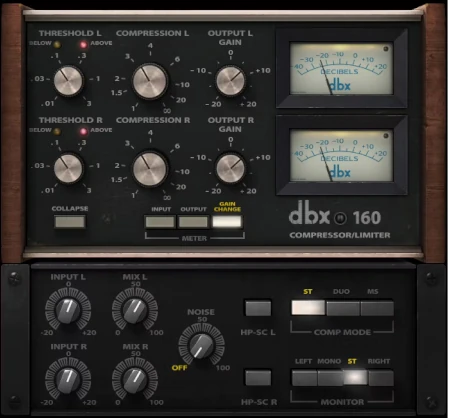
VCA (Voltage Controlled Amplifier) compressors are known for their precision and versatility. These are often used for dynamic range control due to their fast attack and release times. For example, the DBX 160 is a popular choice for controlling bass guitar dynamics, ensuring that the low end remains tight and consistent in the mix. When using a VCA compressor, start with a moderate ratio (around 4:1) and adjust the threshold until the bass sits nicely in the mix without overpowering other elements.
Optical Compressors
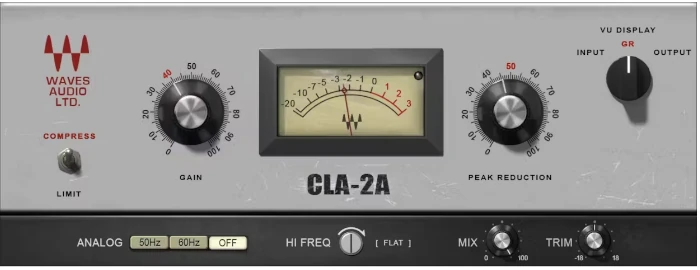
Optical compressors, like the LA-2A, are renowned for their smooth, musical response. They are perfect for vocals, adding warmth and character. The slower attack and release times mean they can gently even out a vocal performance without sounding unnatural. Try setting the peak reduction so that it subtly controls the dynamics, enhancing the vocal’s presence and clarity.
FET Compressors

FET (Field Effect Transistor) compressors, such as the 1176, are known for their aggressive sound and fast response. They excel at adding punch and excitement to drums. A classic trick is the “all-buttons-in” mode, which creates a heavily compressed, explosive drum sound. For a more controlled approach, use a moderate ratio and quick attack/release settings to add punch to your snare or kick drum.
Tube Compressors
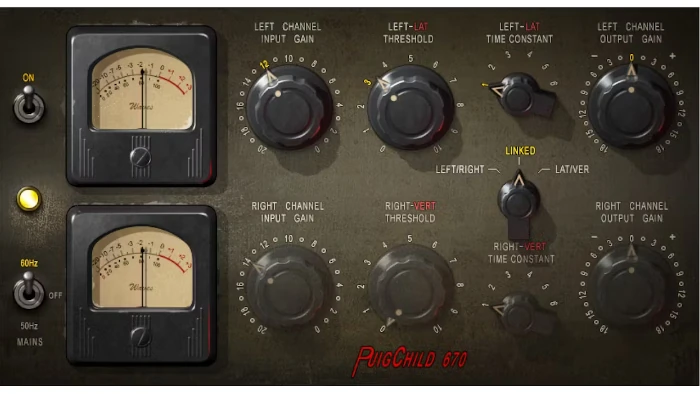
Tube compressors, like the Fairchild 670, impart a warm, vintage character to your sound. They are ideal for adding richness to a mix bus or mastering chain. The subtle saturation from the tubes can glue a mix together beautifully. Start with gentle settings, allowing the tube character to enhance the overall warmth and cohesion of your track.
In conclusion, each compressor type offers unique characteristics that can be harnessed to enhance different elements of your mix. Experimenting with these tools will allow you to shape your sound creatively and effectively.
3. Using Parallel Compression to Enhance Mix Dynamics
Parallel compression, also known as New York compression, is a powerful technique for enhancing mix dynamics without sacrificing the natural elements of the audio. Essentially, it involves blending a heavily compressed signal with the original, uncompressed signal. This approach allows you to retain the natural transients and nuances of the original audio while adding power and sustain to the overall mix.
Understanding the Concept
Think of parallel compression like adding seasoning to a dish. Instead of overwhelming the entire meal with salt, you sprinkle just enough to enhance the flavors. By applying heavy compression to a duplicate track and blending it with the original, the dynamics and punch are enhanced without making the track sound over-processed.
Practical Application
Let’s walk through a practical example. Suppose you’re working on a drum mix, and you want to add more energy and presence. Start by duplicating the drum bus track. On the duplicated track, apply a compressor with a high ratio (e.g., 8:1 or more), a fast attack, and a medium-to-fast release. The goal is to squash the dynamics significantly. Once you’ve got your compressed track, slowly mix it back in with the original drum track until you achieve the desired impact.
Tips for Success
Experimentation is key! Try different settings on your compressor to see how they affect the sound. Additionally, apply parallel compression not only to drums but also to vocals, bass, or even the entire mix for a more cohesive sound. Remember, the aim is to add energy and fullness without losing the track’s original character. Using parallel compression effectively can transform a flat mix into a dynamic and engaging listening experience, making it a staple in the toolkit of any savvy music producer.
4. Creative Uses of Compression
Exploring creative uses of compression can elevate your mixing game to new heights, transforming ordinary tracks into extraordinary sonic experiences. While compression is often perceived as a tool for controlling dynamics, it can also be an artistic instrument that adds color, texture, and emotion to your music.
Pumping Effect for Energy
One of the most popular creative uses of compression is the “pumping” effect, often heard in electronic dance music (EDM). This effect is achieved by sidechain compression, where the compressor is triggered by a different signal than the one it’s affecting. For instance, by sidechaining a bass line to a kick drum, you can create a rhythmic pulsing effect that adds energy and movement to the track. To achieve this, set the kick as the sidechain input on the compressor applied to the bass. Play around with attack and release times to find the sweet spot for your desired groove.
Adding Character with Parallel Compression
Parallel compression, also known as “New York compression,” involves blending a heavily compressed version of a track with its uncompressed counterpart. This technique can add punch and sustain without sacrificing the natural dynamics of the original recording. For example, try applying parallel compression to drums to enhance their impact. Send your drum bus to an auxiliary track with a compressor set to an aggressive ratio and fast attack. Mix this compressed signal back with the original drums to taste, achieving a fuller, more powerful sound.
Enhancing Vocals with Subtle Compression
Using compression creatively on vocals can bring out nuances and sustain certain emotions in a performance. Gentle compression with a slower attack can emphasize the natural transient details of a vocal, adding presence and clarity. Experiment with different compressor types, such as tube or optical compressors, which may impart a pleasing warmth or smoothness. For instance, a subtle use of an LA-2A-style compressor can provide a silky finish to a vocal track, enhancing its appeal without over-processing.
Incorporating these creative compression techniques into your mixing workflow can unlock new dimensions of sound, inviting listeners into a rich and engaging auditory experience.
Conclusion: Mastering Compression in Your Mixes
Summing up the journey through the intricate world of compression reveals how vital this tool is in shaping a polished and professional final mix. To truly unlock the potential of your tracks, remember the essentials we’ve unpacked together.
Firstly, understand the fundamentals of compression—threshold, ratio, attack, release, and make-up gain. Each one plays a crucial role in achieving the right dynamics and ensuring that the compression doesn’t compromise the musicality of your work.
Secondly, consider the context of every instrument within your mix. Applying compression isn’t a one-size-fits-all process. Tailor your approach: a snare drum might require tight, punchy compression, whereas vocals might need a smoother, more subtle touch. Real-life case studies, like the way renowned producers sculpt their dynamic range, highlight that successful tracks often employ differentiated compression settings.
Thirdly, make the most of parallel compression to enhance depth and presence. New-Life Studio’s acclaimed hit of 2023 brought the kick drum forward without overwhelming other elements by maintaining the balance between compressed and uncompressed sounds.
Now, it’s your turn to experiment! Dive back into your projects and analyze how compression can elevate each component. Always A/B test your settings, and remember that what works for one song may not suit another. Practice and listen actively, training your ears to distinguish between subtle changes.